Camper Fridge Removal: Step-by-Step Guide
Getting a refrigerator out of a camper might seem like a straightforward task, but it can quickly become a puzzle. Knowing exactly how to remove a fridge from a camper involves understanding the various ways these units are secured and the specific challenges presented by cramped RV spaces. It’s crucial to approach this with patience and the right information to avoid damage to both the appliance and your vehicle.
When tackling this project, remember that camper fridges, like RV refrigerators, often use specialized mounting brackets and connections that differ from standard household appliances. For absorption-type RV refrigerators, proper ventilation is key to their operation and can influence removal. As of 2026, manufacturers often detail complex installation procedures in their manuals, but removal steps can be less explicit, requiring a bit of investigative work on your part.
Quick Answer
To remove a fridge from a camper, first disconnect all power sources: AC, DC, and propane. Then, identify and unfasten all securing brackets and screws holding the unit in place. Disconnect any water, drain, or vent lines.
Finally, carefully maneuver the heavy appliance out of its cabinet.
Understanding Your Camper Fridge Removal Challenge
The first step in successfully removing a fridge from your camper is to get a good handle on what you’re dealing with. Not all camper fridges are the same, and how they’re installed can vary quite a bit. This directly impacts how you’ll need to approach their removal.

Image source: YouTube / Leisure Coachworks (YouTube thumbnail (fair-use with source credit))
Generally, you’ll find two main types of refrigerators in campers: absorption refrigerators and compressor refrigerators. Absorption fridges, often called three-way fridges, are common because they can run on propane, 12V DC, or 120V AC power. They work by using heat (from propane or electricity) to circulate coolant through a chemical solution.
Compressor fridges, on the other hand, are more like home refrigerators, using a compressor and refrigerant to cool. They typically run on 12V DC or 120V AC.
The critical difference for removal is that absorption fridges require a venting system, usually through the exterior of the RV, to dissipate heat. This means you’ll have more connections to deal with, not just electrical. For compressor models, it’s usually straightforward electrical hookups and mounting hardware.
Identifying your fridge type is key to knowing what to expect in the next steps.
Is It Really a Fridge or Something Else? (Absorption vs. Compressor)
Knowing whether you’re pulling out an absorption or a compressor fridge is fundamental. It dictates the complexity of the job and the types of connections you’ll need to address. This distinction isn’t just academic; it’s the bedrock of a safe and successful removal.
Absorption refrigerators, often branded by names like Dometic or Norcold, are typically larger and found in older RVs or those prioritizing propane operation for boondocking. They have a distinct cooling unit that often requires external venting. This system uses ammonia, water, and hydrogen to create the cooling effect, and while efficient, it means dealing with gas lines and proper ventilation channels.
Compressor refrigerators are becoming more popular in newer RVs and vans. They are generally more energy-efficient on 12V DC power compared to absorption models, making them a great choice for those with extensive solar setups. These work much like your home fridge, using a sealed system with a compressor.
They don’t require external gas lines for operation but will have electrical hookups. Their removal involves primarily electrical disconnects and standard mounting hardware.
Safety First: Disconnecting Power, Gas, and Water Lines
Before you even think about unbolting anything, safety is paramount. Accidentally leaving power, gas, or water connected while attempting removal can lead to serious injury, fire, or damage to your camper. This phase requires your full attention.
Power Down: AC and DC Essentials
First, you need to shut off all electrical power to the refrigerator. For 120V AC power, this means locating your RV’s breaker panel and flipping the breaker that controls the refrigerator. If you can’t identify it, it’s safer to turn off the main breaker for the entire RV or unplug from shore power entirely.
For 12V DC power, you’ll need to locate the control panel or fuse box and remove the specific fuse or turn off the dedicated circuit for the refrigerator. Always double-check with a non-contact voltage tester to ensure all power sources are dead before proceeding.
Gas Off: Propane Line Disconnect
If your camper has a propane-powered refrigerator (most absorption models do), this step is critical and requires careful execution. You absolutely must shut off the main propane supply to the entire RV first. This is usually done via a shut-off valve on the propane tank itself.
Once the main supply is off, you’ll need to go to the refrigerator’s gas line connection. This is typically a flexible or hard line connecting to the back or bottom of the fridge.

Image source: YouTube / Joni Portwood (YouTube thumbnail (fair-use with source credit))
Unscrew the gas line fitting. Be aware that some residual propane might be in the line, so it’s wise to have a rag ready and do this in a well-ventilated area. It’s highly recommended to use two wrenches: one to hold the fitting on the appliance steady and the other to turn the nut on the supply line.
This prevents putting stress on the appliance’s internal gas components. Per the U.S. Department of Transportation’s Pipeline and Hazardous Materials Safety Administration guidelines, all propane systems should be handled with care, and any leaks detected should be addressed immediately.
Water Woes: Drainage and Line Sealing
Some RV refrigerators have an ice maker or a water dispenser, which means there’s a water line. You’ll need to disconnect this. It’s usually a small copper or plastic line.
You might need a small adjustable wrench or pliers. Turn off the water supply to the RV first, or if it’s a direct connection to the fridge, be prepared for a small amount of water to drain out. Have a bucket or towels ready.
Once disconnected, you’ll want to cap or seal the line if you’re not immediately installing a new fridge, to prevent leaks or debris from entering the supply system. If your fridge has a drain line (common for condensation), disconnect and cap that as well.
Locating and Understanding the Securing Mechanisms
Once all utilities are safely disconnected, the next crucial step is figuring out precisely how the refrigerator unit is held in place within its cabinet. Manufacturers use various methods to secure these appliances, especially given the vibrations and movement inherent in travel. Missing a fastener can lead to the unit shifting or falling, causing damage or posing a hazard.
What’s Holding It In? Bolts, Brackets, and Hidden Fasteners
Most RV refrigerators are secured to the surrounding cabinetry or the RV structure with brackets, screws, or bolts. These are often hidden from view, meaning you might need to remove decorative trim, access panels, or even parts of the interior cabinetry to find them. Common locations for these fasteners include:
- Along the top and bottom edges: Look for brackets screwed into the top or bottom of the fridge frame and into the overhead cabinetry or floor.
- Behind access panels: Many fridges have removable panels on the front or back (sometimes accessible from the outside of the RV) that conceal mounting hardware.
- Inside the refrigerator compartment: Occasionally, you might find screws or bolts directly through the fridge’s inner frame into the surrounding cabinetry.
- Along the sides: Brackets might be attached to the sides of the fridge and then screwed into the cabinet walls.
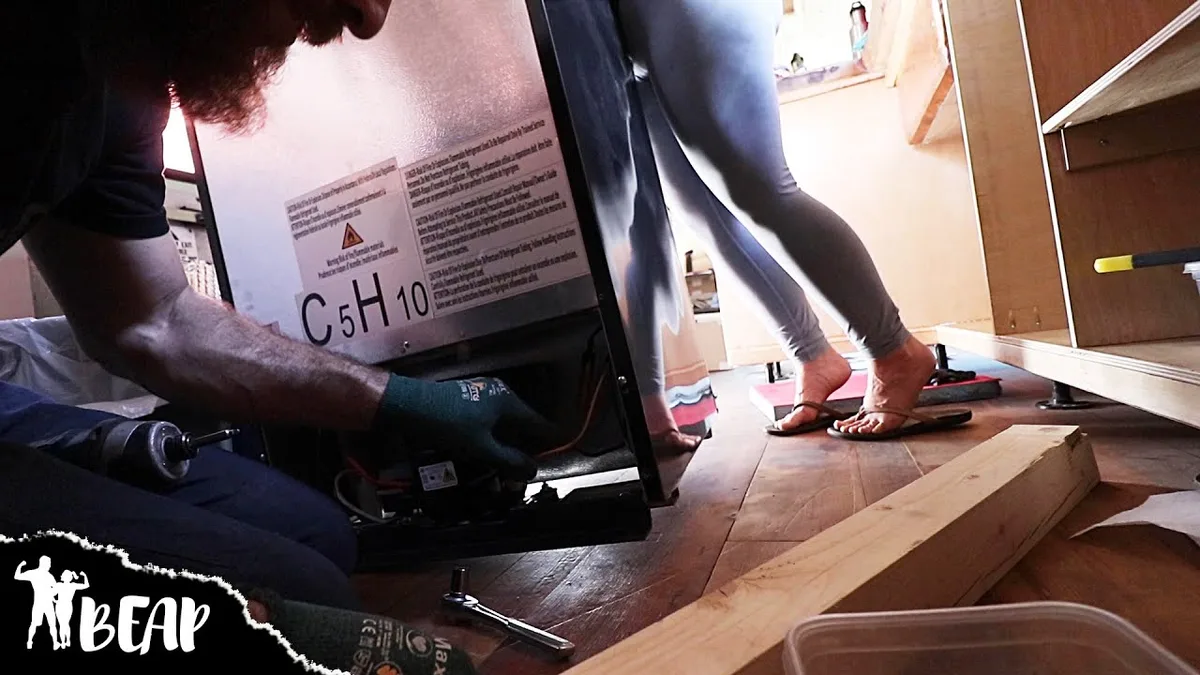
Image source: YouTube / BE Adventure Partners (YouTube thumbnail (fair-use with source credit))
It’s a good idea to have a selection of screwdrivers (Phillips and flathead) and socket wrenches on hand, as you’ll encounter various screw head types and bolt sizes. Sometimes, the securing mechanism isn’t a bracket but rather the fridge is “friction-fit” or held by support beams around it, especially in older or custom installations. Don’t force anything; if it feels stuck, double-check everywhere for hidden fasteners.
Manufacturer manuals, if you can find them for your specific RV model or fridge unit, are invaluable here.
The Careful Dance: Unmounting and Pulling the Fridge
With all connections severed and securing mechanisms located, it’s time for the main event: getting the fridge out. This is where the physical effort comes in, and it’s often a two-person job due to the weight and awkwardness of these appliances.
First, ensure anything inside the fridge is removed. Empty shelves and drawers. Even an empty fridge is surprisingly heavy.
You might need to gently pry the fridge away from the surrounding cabinetry if it’s sealed or has been in place for a long time. Use a putty knife or a thin piece of plastic to break any seals without damaging the cabinet or the fridge frame.
Once it starts to move, be prepared for its weight. It’s often best to try and slide it forward, out of the opening. If the floor is a hard surface, you might be able to use a furniture dolly or sliders to help it glide, but be cautious of gouging cabinet floors.
If you’re pulling it out and it has a gas absorption unit, remember the cooling coils and venting system might snag. Keep a close eye on any wires or lines you might have missed disconnecting. The goal is to slide it out smoothly, controlling its descent if it’s tall.
Protect your floors and your back!
Dealing with the Unexpected: Common Fridge Removal Hiccups
Even with the best preparation, things don’t always go as planned when removing an RV fridge. Anticipating potential problems can save you a lot of frustration and prevent costly mistakes.
When the Fridge Won’t Budge: Jams and Obstructions
Sometimes, after you’ve disconnected everything and removed obvious fasteners, the fridge just won’t slide out. This is often due to hidden brackets, adhesive used during manufacturing, or simply the fridge being wedged tightly into its enclosure over years of service. In these cases, patience is key.
Double-check all access points and trim pieces for any remaining screws or clips. You might need to gently tap around the edges of the fridge with a rubber mallet to help loosen it. If it’s still stubborn, assess if the cabinet itself might be slightly out of square, or if the fridge frame has warped.
You may need to carefully remove a small section of adjacent cabinetry to gain clearance. Never use extreme force, as this can damage the fridge, the surrounding cabinetwork, or even the RV’s structure.
Navigating Tight Spaces and Awkward Access
Camper refrigerators are often installed in places that are difficult to reach. The opening might be narrow, or there might be other fixtures or cabinetry directly in the path of removal. This is where planning your exit route is as important as planning the removal itself.
Measure the fridge and the opening carefully beforehand. Consider if you’ll need to remove any baseboards, adjacent drawers, or even a countertop section to create the necessary clearance. If the fridge is particularly heavy and the opening is tight, you might need specialized lifting straps or a hand truck designed for appliances, being extremely careful not to scrape the RV’s interior finishes.
If you’re working alone, seriously reconsider, as pushing or pulling a heavy, awkward appliance in a confined space is a recipe for disaster.
What to Do With the Empty Space
Once the old refrigerator is out, you’ll be left with an empty cavity. This is your chance to either install a new, updated appliance or repurpose the space. If you plan on putting in a new RV refrigerator, ensure the new unit’s dimensions fit the opening, or be prepared to modify the cabinet.
Always check manufacturer specifications for new appliance clearances and venting requirements. This is also a good time for any necessary repairs to the cabinet structure or surrounding finishes.
You could also convert this space into something else entirely. Some RV owners have turned these areas into extra storage by building shelves, while others have installed custom cabinets or even a small dishwasher port. If you’re not replacing the fridge with another large appliance, consider how you’ll close off the opening.
You might need to fabricate a new front panel, install doors, or create a sturdy shelf.
Preparing for a New Appliance or Different Use
If you’re installing a replacement fridge, preparation is key to a smooth process. Measure the new unit meticulously to ensure it fits the existing opening. Pay close attention to height, width, and depth, as well as the door swing.
You’ll also need to confirm it has the proper electrical or propane hookups and ventilation requirements. If the new fridge is different in size, you might need to adjust the cabinetry.
For other uses, like added storage, you’ll want to reinforce the cabinet floor and sides. Adding bracing can support heavier loads. If building shelves, use sturdy materials and ensure they are securely fastened.
For a clean look, you might need to create a new front panel or door that matches your RV’s interior décor. Proper finishing, such as painting or applying wood veneer, can make the repurposed space look intentional and professional.
Key Takeaways for a Smoother Removal
When tackling the removal of a camper fridge, remember that preparation and safety are your most important tools. Always disconnect power, propane, and water lines before you start. Identify all securing mechanisms, as these can be hidden and require careful searching.
Work methodically, and if possible, enlist a helper, as these units are heavy and awkward.
Don’t rush the process. Measure twice, unbolt once. If you encounter unexpected issues, take a step back and re-evaluate the situation rather than forcing components.
Consulting your RV and appliance manuals can provide crucial details specific to your setup. If at any point you feel uncomfortable or unsure, especially with gas lines, it’s always best to consult a qualified RV technician.
Frequently Asked Questions
How long does it take to remove a camper fridge?
The time needed can vary significantly. If it’s a simple compressor fridge with easily accessible fasteners, it might take 1-2 hours. For a complex absorption fridge with hidden brackets and gas lines, expect 3-4 hours or more, especially if it’s your first time.
Can I remove a camper fridge by myself?
While possible for smaller, lighter units in simple installations, it’s not recommended. Camper fridges are heavy and bulky, making them difficult to maneuver safely. Working with a helper is strongly advised for both safety and ease.
What tools do I need to remove an RV refrigerator?
You’ll typically need a set of screwdrivers (Phillips and flathead), socket wrenches, adjustable wrenches, possibly pliers, a non-contact voltage tester, and a putty knife or trim tool for prying. A bucket and towels are essential for water connections.
What are the risks of removing a propane fridge incorrectly?
The primary risks involve gas leaks, which can lead to fire or explosion. Improperly disconnecting electrical lines can cause shocks or damage to your RV’s electrical system. Forcing the unit can damage the appliance or the RV’s structure.
Should I cap off the propane line after removal?
Yes, absolutely. After disconnecting, you must securely cap off the propane line to prevent any dangerous gas leaks. Use a proper propane cap or fitting designed for your RV’s propane system.