What Is an Air Tent? A Complete Beginner’s Guide
Setting up a large family campsite can often feel like a test of patience, especially when you are dealing with a confusing mess of metal poles and high winds. If you want to bypass the frustration of complex assembly, inflatable outdoor shelters offer a modern path forward. Understanding what an air tent is is the first step toward simplifying your outdoor gear setup.
These modern structures replace heavy steel or fiberglass support poles with pressurized air columns. Our research shows that inflatable models have grown rapidly in popularity as of 2026 due to their ease of pitching. Let us look at how this technology operates and whether it fits your specific style of outdoor recreation.
Quick Answer
An air tent is a modern camping shelter that uses pressurized, inflatable air beams instead of traditional metal or fiberglass poles for its structural support. These air beams are sewn directly into the tent fabric and inflated using a manual or electric pump. A single person can easily pitch a large family-sized air tent in under ten minutes.
How Inflatable Air Beam Technology Works
Traditional tents rely on rigid tension, using fiberglass or aluminum poles to stretch the fabric into shape. Air tents work on the opposite principle. They utilize internal structural columns filled with highly pressurized ambient air to push the fabric upward and outward.
When you pump air into the system, the columns expand until the walls under pressure become completely rigid. This structural design mimics the physics of high-pressure bicycle tires. The inflated beams become supportive pillars that are exceptionally strong yet highly flexible.
Under high wind loads, these pressurized columns do not snap. Instead, they deflect the wind by bending slightly and then immediately popping back into their original shape.
This pressurized air system is highly reliable when inflated to the correct level. The air inside cannot rust, splinter, or tear through the fabric sleeves. If you are learning how to choose a tent for your family, understanding this mechanical difference is key to evaluating modern gear options.
Core Components: Anatomy of an Air Tent
An inflatable tent looks like a standard shelter from the outside, but its internal structural engineering is entirely different. The frame relies on a layered defense system to keep the structure standing under heavy weather.

Image source: YouTube / Vango (YouTube thumbnail (fair-use with source credit))
The TPU Bladder (The Internal Tube)
The core of every air beam is a highly flexible, airtight bladder made of Thermoplastic Polyurethane (TPU). This bladder holds the pressurized air and must remain completely sealed. Manufacturers use TPU because it expands and contracts without cracking, even in sub-zero winter temperatures.
The Protective Sleeve (The Shield)
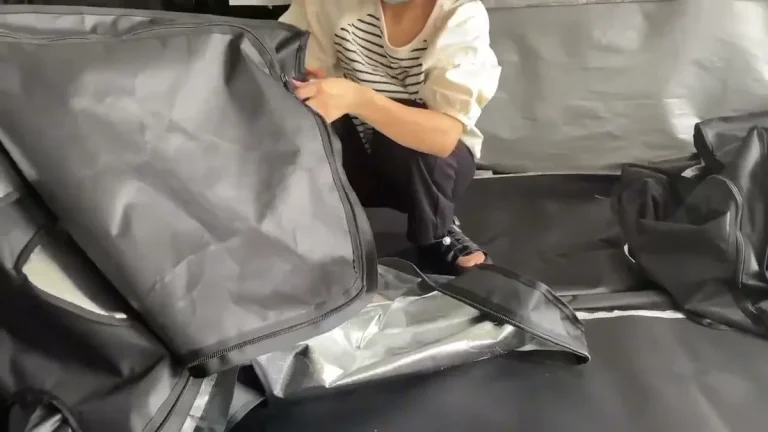
Because bare TPU bladders are vulnerable to punctures, they are zipped inside heavy-duty protective sleeves. These sleeves are often made of thick Oxford polyester or double-layered nylon. This outer casing restricts the bladder from over-expanding and protects it from sharp pinches or friction against the main tent fabric.
High-Flow and Pressure-Release Valves
Every air beam features a secure inflation valve, which is usually a high-flow Boston valve. This design allows air to enter quickly while preventing it from escaping when you remove the pump nozzle. Premium air tents also feature pressure-release safety valves, which automatically vent small amounts of air if the internal pressure rises too high.
Single-Point vs. Multi-Point Inflation Systems
Inflatable structures generally use one of two air delivery designs:
- Multi-Point Inflation: Each air beam is isolated with its own individual valve. You must move your pump from beam to beam to inflate them one by one. If one beam punctures, the others remain fully inflated.
- Single-Point Inflation: All the beams are linked together by a network of internal air hoses with isolation taps. You attach the pump to a single master valve to inflate the entire tent at once. This system is faster but slightly heavier and more complex.
The Pros: Why Campers are Switching to Air Tents
The primary reason outdoor adventurers choose inflatable shelters is the lack of physical strain during setup. Instead of lifting heavy canvas while trying to slot fragile fiberglass poles into place, you can let the air pressure do the heavy lifting.
This speed is a major benefit if you are trying to set up tent for camping in the middle of a sudden rainstorm. A large six-person inflatable shelter can be fully erect in under five minutes. This leaves you with plenty of extra time to focus on interior comforts.
Another massive benefit is structural durability in high winds. During severe storms, traditional metal poles can bend permanently, while fiberglass poles often splinter and rip through the rainfly. Air beams simply compress under sudden force and bounce straight back into place once the wind gust passes.
This flexibility makes them incredibly safe for family trips. You will also find that pitching is entirely a one-person job. Even the largest inflatable models can be raised by a single adult, which is a lifesaver if you need to supervise young kids at a busy camp.
The Cons: The Hidden Drawbacks of Inflatable Tents
While the pitching process is incredibly simple, air tents have a few clear limitations that you must consider before buying. The most significant drawback is the overall pack weight and bulk.
With a poled tent, you can separate the heavy metal poles into their own bag to split the load between two people. With an air tent, the heavy TPU beams are permanently sewn into the fabric structure. This means you must carry the entire heavy mass as one single unit.
Large family models can easily weigh over 70 pounds, which can make loading them into a vehicle trunk a two-person job. This bulk also makes them completely impractical for backpacking trips. If lightweight travel is your goal, you will need to stick to traditional poles and explore options like a lightweight sleeping pad to keep your pack weight down.
Additionally, the initial cost is much higher than traditional camping gear due to the advanced manufacturing required for airtight bladders. You also face the risk of a single-point failure if you happen to lose, damage, or forget your high-volume air pump at home. If you want to dive deeper into alternative setups, you can also look into how to rent a camping tent to test different styles before buying.
Side-by-Side: Air Tents vs. Traditional Poled Tents
Understanding the practical trade-offs between air beams and traditional poles requires looking at how they perform in real camping situations. While both designs keep the rain off your head, their daily handling, transport logistics, and structural limits are completely different.
Comparing Setup Speed and Ease of Use
Setting up a large traditional tent with metal or fiberglass poles is usually a multi-person job. You have to lay out matching sections, feed them through tight fabric sleeves, and lift the heavy structure under tension. This process often takes 30 to 45 minutes of active coordination.
With an air tent, the pitching process is mostly hands-off. Once you peg out the base, you simply attach the pump and inflate the beams, which takes 5 to 10 minutes total. A single person can manage the entire setup without any lifting or balancing acts.
Comparing Wind Resistance and Durability
In high winds, traditional poles act as rigid anchor points. If the wind force exceeds the structural strength of the metal or fiberglass, those poles will snap or bend permanently. Broken fiberglass poles can also splinter, which often slices directly through the tent rainfly.
Air tents handle wind through flexibility. When hit by a violent gust, the air beams compress slightly to absorb the force and then pop right back into their original shape. There are no rigid parts to break, bend, or spear through your tent fabric.
Comparing Weight, Pack Size, and Logistics
This is where traditional poles have a distinct advantage. A poled tent allows you to pack the heavy poles separately from the lightweight fabric. This split makes it much easier to share the carrying weight between two people or pack the pieces into tight trunk spaces.
Because an air tent has its inflatable beams permanently sewn into the main fabric, you cannot split the load. The entire packed bundle is heavy and highly bulky. You must have enough physical strength to lift the singular, heavy roll into your car trunk, and it will occupy a significant amount of cargo space.
Comparison Metric Table
| Performance Factor | Inflatable Air Tents | Traditional Poled Tents |
|---|---|---|
| Average Pitching Time | 5 to 10 minutes | 30 to 45 minutes |
| Setup Difficulty | Very low (one-person job) | Moderate to high (usually needs help) |
| Wind Failure Mode | Temporary bend (self-recovers) | Structural snap or permanent bend |
| Weight Distribution | Single heavy bundle (cannot split) | Modular pack (poles pack separately) |
| Vehicle Trunk Space | High demand (very bulky) | Low to moderate demand |
| Required Accessories | High-pressure hand or electric pump | Ground pegs only |
Who is an Air Tent Best For?
Deciding to invest in an inflatable shelter depends entirely on how you travel and who you camp with. The high price tag and physical bulk mean these tents are highly specialized tools, not a universal fix for every camper.
The Large Family Camper
If you regularly head out with children, an air tent is a massive upgrade. The speed of setup means you can have your entire shelter standing minutes after arriving at your campsite. This allows one parent to supervise the kids or organize sleeping arrangements while the other easily manages the entire outdoor setup alone.
If your goal is to make tent camping more comfortable with minimal physical labor, this is the ideal path.
The Solo Parent Camper
Camping alone with young kids can be incredibly stressful when using a traditional poled tent. Trying to slide long, springy poles through fabric sleeves while keeping an eye on toddlers is a recipe for frustration. An air tent removes this obstacle entirely since you do not need anyone to hold up the other side of the structure while you raise it.
When to Stick to Metal or Fiberglass Poles
You should avoid air tents if you plan on backpacking, cycle touring, or traveling in a compact car. The massive packed size of an inflatable tent requires a generous vehicle trunk. Furthermore, budget-conscious campers will find that traditional pole tents offer much better value per square foot of living space.
A high-quality poled model is also a smarter choice if you want to set up an easy tent for backyard camping where setup speed is not a major issue.
Step-by-Step: How to Properly Pitch and Deflate an Air Tent
Pitching and packing away an air tent is easy, but you must follow a specific sequence to protect the internal TPU bladders from damage. Skipping simple steps can lead to twisted beams or trapped air that makes packing impossible.

Image source: YouTube / Lebecom (YouTube thumbnail (fair-use with source credit))
Pitching: Securing, Valving, and Pumping
- Clear the footprint: Remove all sharp rocks, roots, and twigs from the ground before laying down your footprint protector. A clean surface protects the bottom of your tent and prevents under-floor bladder punctures.
- Peg the four corners first: Spread the tent over your footprint and peg down the four main corners tightly. This keeps the tent anchored and aligned as it begins to inflate.
- Check and close all deflation valves: Walk around the tent and ensure the secondary deflation valves are screwed shut tightly. Keep only the main inflation valves open.
- Pump to the recommended pressure: Attach your double-action manual hand pump to the first valve. Start pumping while keeping an eye on the integrated pressure gauge. Most manufacturers recommend inflating between 6 and 8 PSI. Never guess the pressure by feel; always trust the gauge to prevent over-inflation.
- Peg out the guylines: Once all the beams are rigid and vertical, walk around the perimeter to peg out the rest of the base and tension the guylines.
Packdown: Valving, Folding, and the “Air Squeeze” Technique
- Open the deflation valves fully: Unscrew all the main pressure valves. The air will escape with a loud hiss, and the tent will collapse on itself instantly.
- Leave the valves open during folding: Keep all valving covers open while you fold the tent. This allows any trapped air inside the bladder sleeves to escape as you compress the fabric.
- Fold toward the open valves: Fold the tent lengthwise into a long strip that matches the width of your carry bag. Always start folding from the side opposite the valves, working your way toward them. This actively pushes the remaining air out of the open ports.
- Roll tightly and slide on the bag: Roll the folded strip tightly like a sleeping bag, using your knees to press down and squeeze out any hidden air pockets. Once fully rolled, slip the storage bag over the rolled tent rather than trying to lift the tent into the bag.
Critical Mistakes to Avoid with Inflatable Tents
Inflatable support systems are highly durable, but they are vulnerable to specific environmental changes and user errors. Avoiding these common pitfalls will ensure your tent lasts for years of camping trips.
Overinflating in Direct Midday Heat
Air expands when heated. If you inflate your tent to its maximum 8 PSI limit during a cool, damp morning, that internal pressure will rise significantly under the hot afternoon sun. This thermal expansion can over-pressurize the TPU bladders, leading to structural bulges or ruptured seams.
If your tent does not feature automatic pressure-release valves, always let a tiny bit of air out of the beams when the sun is at its peak.
Forgetting or Damaging the Dedicated Pump
Traditional tent poles can often be repaired on-site using a simple metal splint sleeve and some duct tape. If you forget your high-volume pump or damage its hose, your air tent is completely useless. Always store your pump in the same carry bag as the tent, and shield the flexible hose from heavy items that could crush or split the plastic.
Packing Away a Wet Air Tent
Moisture trapped between the air beam sleeves and the main tent fabric is a recipe for mold, mildew, and fabric rot. If you must pack up your campsite during a rainstorm, you must unroll the tent at home within 24 hours to let it dry completely. Pay close attention to the zippered sleeves that house the internal bladders, as these thick fabric layers hold moisture longer than the main canopy.
Troubleshooting and Maintenance
Taking care of your inflatable tent requires a different approach than maintaining traditional gear. Since the beams are the core of the structure, routine inspection and a basic understanding of repairs are essential.
How to Find and Patch a Puncture on the Trail
Locating a tiny air leak in a structural beam is straightforward if you use the right method. If you notice a beam is losing pressure over several hours, you have a slow puncture.
- Locate the leak: Inflate the sagging beam slightly. Mix a few drops of liquid soap with water in a spray bottle and spray it over the inflated beam sleeve. Watch for growing soap bubbles, which will pinpoint the exact location of the escape hole.
- Access the bladder: Cleanly unzip the protective canvas sleeve to access the internal TPU bladder.
- Apply the patch: Clean the area around the puncture with an alcohol wipe to remove dirt and skin oils. Peel the backing off a heavy-duty adhesive TPU repair patch, press it firmly over the hole, and hold it down for two minutes to secure the bond.
Caring for Your Valves and TPU Bladders Long-Term
Dirt and sand grains can easily ruin the airtight seal of your structural valves. Whenever you pitch or pack away your tent, inspect the rubber O-rings inside the valves to make sure they are clean and free of grit. Wipe them down with a damp microfibre cloth if needed.
Additionally, avoid using aerosol lubricants or silicone sprays on your valves, as these chemicals can degrade the rubber seals over time. Store your tent in a cool, dry place away from extreme temperature swings, which can weaken the heat-welded seams of the TPU bladders. If you plan on camping in freezing weather, check out our guide on how to stay warm tent camping and keep your gear performing well.
Frequently Asked Questions
Do air tents inflate by themselves?
No, you must pump them manually using a double-action hand pump or connect a 12V electric pump to automate the inflation.
Can you use an air tent for winter camping?
Yes, you can use them in cold weather because there are no metal poles to freeze. You can read up on whether you can you camp in a tent in winter to choose the right insulation setup.
How long does an inflatable tent stay inflated?
A high-quality inflatable tent will remain standing for weeks without needing a top-up. Under extreme temperature changes, you might need to add a few pumps of air to compensate for natural cold-weather pressure drops.
How much do these structures cost on average?
Premium inflatable family tents generally cost between 600 and 2000 USD. If you are comparing registration rates and trip expenses, like figuring out how much is Interlochen summer camp, adding premium gear will change your overall vacation budget.