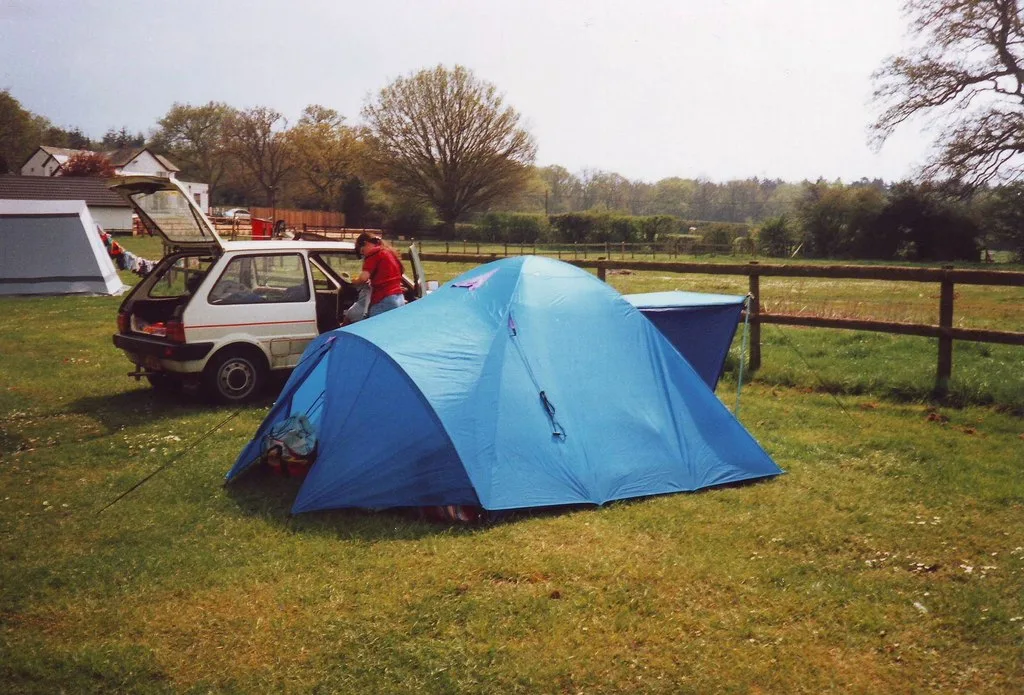
How to Choose a Tent: A Complete Beginner’s Guide
If you’ve ever stared at a wall of tents online and felt your brain short-circuit, you’re not alone. There are dome tents, tunnel tents, cabin tents, backpacking tents, car camping tents, and enough “season” ratings to make your head spin. Learning how to choose a tent doesn’t have to be that complicated, though.
The answer comes down to five simple questions about where you sleep, when you go, and who comes with you.
Manufacturer specifications show that most tents fall into one of three clear categories: backpacking tents (under 5 pounds), car camping tents (roomy and heavy), and 4-season tents (built for snow and wind). As of 2026, the market is full of solid options in each group. So let’s walk through the questions that actually matter.
Quick Answer
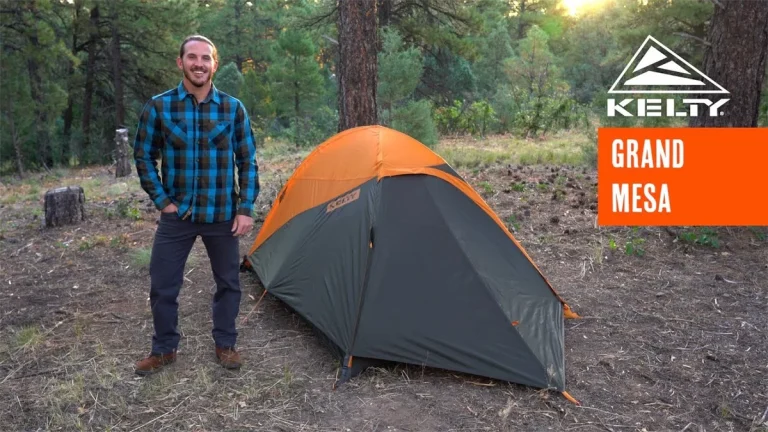
To choose a tent, match it to your trip. Backpackers need a lightweight tent under 5 pounds. Car campers want space and headroom.
Winter campers need a 4-season model. Pick a capacity one person larger than your group size. Choose between aluminum poles for durability and fiberglass for budget.
Make sure the rainfly has a hydrostatic head rating of at least 1500mm.
The 5-Step Framework: How to Find Your Perfect Tent
Step 1: Nail Down Your Trip Type
This is the biggest decision you’ll make. Your trip type determines about 80 percent of your tent choice. Everything else is fine-tuning.
Backpacking. You carry everything on your back. Every ounce matters. A 4-person tent that weighs 12 pounds is a non-starter.
You want a tent with a trail weight under 5 pounds, ideally under 3 for solo trips. These tents have smaller floor areas, lower peak heights, and pack down into a stuff sack the size of a loaf of bread. They use thinner fabrics and smaller-diameter poles to save weight.
You trade space and durability for portability.
Car camping. You drive to your campsite. Weight doesn’t matter. You can haul a 20-pound tent if you want.
Here, you optimize for comfort, space, and ease of setup. Cabin-style tents with near-vertical walls give you full standing room. Multiple rooms and large vestibules make life better when the weather turns.
This is where you find instant tents that pop up in under two minutes. It’s also where you find the best value per square foot.
Base camping. You hike in once and set up for multiple nights. Weight matters less than backpacking but more than car camping. You can tolerate a 6 to 8-pound tent if it means more space and better weather protection.
Geodesic designs shine here because they handle wind well.
Winter and mountaineering. This is a different animal entirely. You need a 4-season tent designed to shed snow loads and withstand high winds. These tents have stronger pole structures, often geodesic or semi-geodesic.
They have solid fabric panels instead of mesh to block snow and wind. They weigh more and cost more. If you don’t camp in snow, do not buy one.
They sleep hot in summer.
Step 2: Match the Season and Conditions
Manufacturers label tents as 3-season or 4-season. These are not marketing gimmicks. They are real design specifications that affect safety and comfort.
3-season tents work for spring, summer, and fall. They handle rain, moderate wind, and mild temperatures. They use lots of mesh for ventilation.
That helps in warm weather but hurts in cold weather. A good 3-season tent with a robust rainfly can handle a surprise snow flurry, but it won’t hold up under sustained snowfall or heavy wind. Aggregate reviews show that a properly pitched 3-season tent with guy lines deployed handles winds up to about 30 mph before things get concerning.
4-season tents are designed for snow, ice, and strong winds. They have fewer mesh panels and more solid fabric. That keeps snow and wind out but makes them stuffy in hot weather.
The pole structure is stronger, often with extra crossing points. The rainfly extends closer to the ground to block drafts. These tents handle winds above 50 mph when pitched correctly.
They are heavier and more expensive.
3+ season tents exist as a middle ground. They have more robust poles than a standard 3-season tent but retain mesh panels for ventilation. Some people call them “shoulder season” tents.
They work well for early spring and late fall camping in moderate climates. They are not a substitute for a true 4-season tent in winter conditions.
The climate factor matters. If you camp in the Pacific Northwest, you prioritize waterproofing and ventilation over wind resistance. If you camp in the desert Southwest, you prioritize sun resistance and airflow. If you camp in the Rockies, you prioritize wind stability and snow shedding.
Look at average conditions for your destination, not best-case summer weather.
Step 3: Get the Capacity Right (It’s Not What You Think)
Tent manufacturers lie about capacity. Not maliciously, but optimistically. A “2-person tent” is designed for two sleeping bags with no extra room.
It fits two people and nothing else. No space for gear. No space to change clothes.
No space to move.
The real formula is simple. Add one to the manufacturer’s stated capacity. If you’re a solo camper, buy a 2-person tent. If you’re a couple, buy a 3-person tent.
If you’re a family of four, buy a 6-person tent. This gives you room for gear, elbow space, and some comfort when the weather traps you inside.
The “gear factor” is real. Backpackers often want a 2-person tent for solo use so they can store their pack inside the vestibule or at their feet. Car campers with a family need a tent large enough for cots, which take up more space than sleeping pads. Check the floor dimensions on the spec sheet, not just the person count.
A 4-person tent with 56 square feet is tight. A 4-person tent with 68 square feet is comfortable.
Kids change the math. Young children take up less space than adults. But they also need room for their gear, toys, and the inevitable stuffed animal migration. Many family tents offer room dividers or separate sleeping areas.
That’s useful if you want adults on one side and kids on the other.
Dogs are not people. Your dog counts for roughly half a person in floor space. A Labrador needs about as much room as a child. A small dog can curl up at your feet.
Check reviews from other dog owners about floor durability and fur cleanup.
Step 4: Decide the Weight vs. Space Trade-Off
Every tent is a compromise between weight and space. You cannot have both. The lightest tents are tiny and tight.
The roomiest tents weigh a ton. Your job is to find the sweet spot for your specific trip.
For backpacking, target 2 to 3 pounds per person. A 2-person tent at 4 pounds is reasonable. A 2-person tent at 5 pounds is heavy but doable for short trips.
A 2-person tent under 3 pounds is ultralight territory and costs more. The trade-off is durability and interior space. Ultralight tents use thinner fabrics that puncture more easily and require careful site selection.
For car camping, weight is irrelevant. Focus on floor area and peak height. Look for at least 20 square feet per person for comfortable car camping.
A 6-person tent with 100 square feet or more gives a family room to spread out. Peak height matters greatly. A tent with 48 inches of headroom requires you to crawl.
A tent with 72 inches lets most adults stand upright.
The vestibule factor. Vestibules are covered areas outside the tent body but under the rainfly. They store wet gear, muddy boots, and backpacks. A tent with a large vestibule effectively gives you more livable space without adding weight to the tent body itself.
Look for vestibules with at least 8 to 10 square feet per person for backpacking. Car camping tents often have integrated awnings or screen rooms that function as oversized vestibules.
Packed size matters for some trips. A tent that compresses small fits in a backpack more easily. Some tents pack into long, skinny bags. Others pack into short, fat bags.
Consider your pack shape and how you distribute weight. Bikepackers and motorcycle campers need tents that pack small. Canoe campers have more flexibility.
Step 5: Set a Realistic Budget
Tent prices range from about $60 to over $1,000. You get what you pay for, but you don’t always need the most expensive option. The key is matching your budget to your use case.
Budget tents ($60 to $150). These work for occasional car camping in mild weather. They use fiberglass poles that are heavier and more prone to breaking. The fabrics are thinner.
The waterproofing is adequate but not exceptional. Seams often need manual sealing. These tents are fine for a family that camps once a year in good weather.
They are not suitable for backpacking, heavy rain, or wind.
Mid-range tents ($150 to $400). This is the sweet spot for most campers. You get aluminum poles, better fabrics, factory-sealed seams, and thoughtful design features. Backpacking tents in this range weigh between 3 and 6 pounds.
Car camping tents offer good headroom and durability. This price bracket includes tents from reputable manufacturers with solid warranty support.
Premium tents ($400 and up). You pay for weight reduction, durability, and feature refinement. Ultralight tents use Dyneema composite fabrics or high-denier silnylon. Winter tents use heavy-duty pole structures and robust fabrics.
The build quality is excellent. Warranty support is usually top-tier. These tents last for years if properly maintained.
The hidden costs. Most tents do not include a footprint. Budget an extra $30 to $60 for a properly fitted footprint. Some tents require aftermarket seam sealing.
Budget for replacement stakes, which are almost universally terrible on budget and mid-range tents. A set of high-quality tent stakes costs about $15 to $25 and transforms your pitching experience.

Image source: YouTube / Exploring Campgrounds (YouTube thumbnail (fair-use with source credit))
The Anatomy of a Good Tent: What to Look for in the Specs
Poles: Aluminum vs. Fiberglass
The pole material determines how your tent handles wind, snow, and years of use. It also affects weight and cost.
Aluminum poles are the standard for quality tents. They are lighter, stronger, and more flexible than fiberglass. When they bend, they don’t snap.
You can straighten a bent aluminum pole and continue your trip. Most backpacking tents use aluminum poles. The alloy matters.
Common grades include 7001 and 6061. Both are good. The diameter also matters.
Thicker poles (9mm and above) offer more strength. Thinner poles (8.5mm) save weight. Aluminum poles add $50 to $100 to the tent price compared to fiberglass.
Fiberglass poles are common on budget tents. They are heavier and less flexible. In cold weather, they become brittle and snap under stress.
A snapped pole ends your trip. Fiberglass poles are acceptable for occasional car camping in mild conditions. They are not suitable for winter use, high wind, or any trip where you depend on your tent.
DAC poles are a specific brand of aluminum poles used by many premium tent manufacturers. They hold a reputation for excellent quality and reliability. If you see DAC poles listed in the specs, that’s a good sign.
Carbon fiber poles exist but remain rare. They are lighter than aluminum and very stiff. They are also expensive and can fail catastrophically without warning.
Most experienced campers stick with aluminum.
Hub systems on instant tents use connected poles that fold like an umbrella. They are convenient for quick setup, but add weight and create a single point of failure. If the hub breaks, the tent is useless until you get a replacement part.
Rainfly and Floor: Waterproofing That Actually Works
Waterproofing is measured in millimeters of hydrostatic head. This number tells you how much water pressure the fabric can withstand before leaking.
For rainflies, look for a hydrostatic head rating of at least 1500mm. Tents rated 2000mm or higher offer excellent waterproofing for heavy rain. Budget tents often have ratings of around 800mm to 1000mm.
Those work in light rain but may leak in sustained downpours.
For floors, the rating should be higher because your body weight presses the floor into wet ground. Look for at least 3000mm on the floor. Some premium tents use 5000mm or 10000mm fabrics.
That’s overkill for most situations but offers peace of mind.
Seam sealing is critical. Needle holes from stitching create thousands of tiny leaks. Factory-sealed tents use seam tape applied with heat and pressure.
That’s the best option. Budget tents often skip factory seam sealing. You have to do it yourself with a liquid sealant.
It takes about an hour and needs to be reapplied every few years.
Bathtub floors are a design feature where the floor fabric extends up the sides of the tub by 4 to 6 inches. This creates a waterproof tub shape. If water pools on your tent site, a bathtub floor keeps it out.
Any tent worth buying has a bathtub floor construction.
The fabric denier tells you about durability, not waterproofing. Denier measures thread thickness. Higher numbers mean thicker, more durable fabric.
A 40D floor is standard for backpacking tents. A 68D floor is found on car camping tents and resists punctures better. A 20D fly saves weight but tears more easily.
Know your trade-offs.

Image source: YouTube / John Stultz (YouTube thumbnail (fair-use with source credit))
Ventilation: The Key to a Dry, Comfortable Night
Condensation kills the camping experience faster than rain. You breathe moisture into the tent. Your body releases moisture as you sleep.
If that moisture can’t escape, it condenses on the tent walls and drips back on you.
Mesh panels are your primary ventilation tool. More mesh means better airflow. Three-season tents have lots of mesh.
Four-season tents have fewer. That’s why 4-season tents feel stuffy in warm weather.
Vents near the top of the rainfly allow warm, moist air to escape while keeping rain out. Good tent designs have adjustable vents you can open or close depending on conditions. Rafters or struts that hold the rainfly away from the tent body create an air gap that promotes ventilation and prevents condensation from dripping onto you.
Double-wall construction is the standard for most tents. An inner tent with mesh walls provides ventilation and bug protection. A separate rainfly provides waterproofing.
The space between the two layers allows moisture to escape. Single-wall tents combine these layers into one. They are lighter but prone to condensation.
They require careful site selection and weather management.
Site selection affects ventilation. Pitching your tent in a low spot traps cold, damp air. Camping under trees can reduce airflow. Opening doors and vents on opposite sides creates cross ventilation.
In hot weather, pitch the doors facing the breeze. In cold weather, pitch with the narrow end facing the wind.
The 5 Most Common Tent Buying Mistakes
Mistake 1: Buying a tent that’s too small. The number on the box is marketing, not reality. A 2-person tent fits two people with zero extra space. You cannot bring gear inside.
You cannot sit up to change clothes. Buy one size larger than you think you need.
Mistake 2: Ignoring the packed weight. Car camping tents can weigh 15 to 20 pounds. They are miserable to carry more than 50 feet. If you think you might hike with your tent, check the trail weight.
Under 5 pounds for backpacking. Under 8 for short hikes. Anything over that stays in the car.
Mistake 3: Skipping the footprint. A footprint protects your tent floor from punctures and abrasion. It also keeps the floor clean. A tent floor costs $100 to $200 to replace.
A footprint costs $30. Use one. If the manufacturer doesn’t sell one, buy a sheet of polycryo or Tyvek and cut it to size.
Mistake 4: Believing “waterproof” without checking the numbers. A tent labeled waterproof might have an 800mm hydrostatic head rating. That’s rain-resistant, not waterproof. Look for the actual specification on the manufacturer’s website or at the manufacturer’s product page. 1500mm minimum for the fly. 3000mm for the floor.
Mistake 5: Buying a 4-season tent for summer camping. A 4-season tent is heavier, hotter, and more expensive than a 3-season tent. It has fewer meshes and more solid fabric. You will sweat and feel trapped in warm weather.
Buy a 4-season tent only if you regularly camp in snow or below-freezing temperatures.
What You’ll Actually Spend: A Quick Price Map
| Tent Type | Price Range | Typical Weight | Best For |
|---|---|---|---|
| Budget car camping | $60 – $120 | 10 – 15 lbs | Occasional fair-weather trips |
| Mid-range car camping | $150 – $350 | 12 – 20 lbs | Family camping, frequent trips |
| Budget backpacking | $100 – $200 | 4 – 6 lbs | Short backpacking trips, tight budget |
| Mid-range backpacking | $200 – $400 | 3 – 5 lbs | Multi-day backpacking, reliable gear |
| Ultralight backpacking | $400 – $800 | 1.5 – 3 lbs | Thru-hiking, weight-obsessed trips |
| 4-season mountaineering | $400 – $900 | 6 – 10 lbs | Winter camping, alpine conditions |
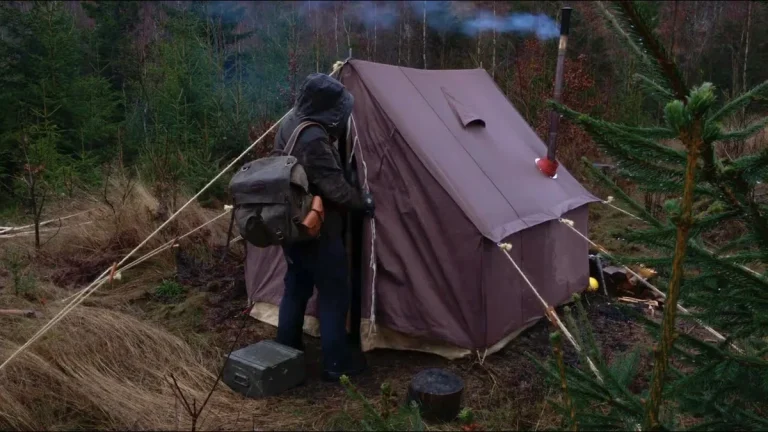
| Hot tent (with stove) | $400 – $1200 | 8 – 15 lbs | Winter base camping, extreme cold |
These ranges reflect current market pricing as of early 2026. Prices vary by brand, materials, and seasonal sales.
Pro Tips for Your First Trip (and Beyond)
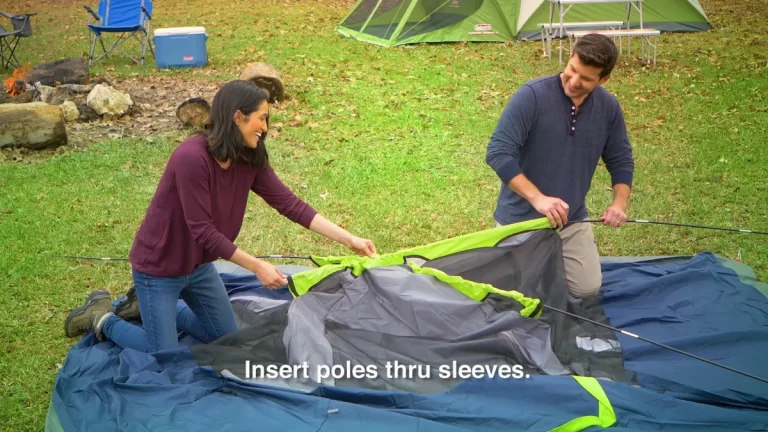
Set up your tent at home first. Do not wait until you’re at a dark campsite in the rain. Pitch it in your backyard or living room. Learn how the poles go together.
Figure out the clip system. Find the stake loops. This 15-minute practice session saves you an hour of frustration later.
Guy lines are not optional. Most tents come with reflective guy lines. Use them. They stabilize the tent in wind, create ventilation gaps under the rainfly, and prevent pole flex.
Stake out every guy line when the wind is forecast. If you’re planning to do this properly, check a step-by-step guide for pitching your tent correctly before your first real trip.
Store your tent dry. Packing a wet tent leads to mold, mildew, and fabric degradation. If you have to pack up in the rain, dry the tent as soon as you get home. Hang it in a garage or bathroom.
Never store a tent long-term in its stuff sack. Loosely roll it or hang it in a cool, dry place.
Replace the factory stakes. Budget tents come with cheap wire stakes that bend on hard ground. Replace them with 6-inch aluminum stakes or 8-inch titanium shepherd hooks. They cost $15 and improve your tent’s performance dramatically.
Carry a couple of 10-inch stakes for sandy or loose soil.
Know how to handle the cold. If you’re camping in cooler weather, your bag and pad matter as much as the tent. There’s a complete guide on staying warm at night that covers the full system: sleeping bags, pads, and clothing layers. The tent keeps the wind and rain off you.
Your insulation keeps you warm.
Rent before you buy. Outdoor gear shops often rent tents. Renting a 2-person backpacking tent for a weekend costs about $30 to $50. That’s cheaper than buying the wrong tent.
It also lets you test features you might not know you need. Renting is especially useful for trying a backyard sleepout with kids before committing to a family tent.
The 30-Second Decision Guide: Pick Your Tent Type
You are a backpacker. You carry your tent on your back. Weight is critical. Choose a 3-season tent under 5 pounds.
Aluminum poles. Double-wall construction. 1500mm minimum hydrostatic head on the fly. Store your pack in the vestibule.
You are a car camper. Weight doesn’t matter. Space and comfort do. Choose a 3-season cabin tent or dome tent.
Look for peak height over 6 feet. Bathtub floor. Good ventilation.
An instant setup model saves time after a long drive.
You are a winter camper. You sleep in snow and below-freezing conditions. Choose a 4-season geodesic tent. Strong pole structure.
Solid fabric panels. Snow flaps around the base. A proper vestibule for gear storage.
Practice pitching it with gloves on.
You are a family camper. You need space for people and gear. Choose a large cabin tent with room dividers. Dark fabric helps kids sleep later.
Look for a full-coverage rainfly. Multiple doors prevent midnight traffic jams. Use a gear loft for storage.
You are a solo camper. You want lightweight and simple. A 1-person or 2-person backpacking tent works. A trekking pole tent saves even more weight if you already use hiking poles.
Practice the setup a few times so it feels natural.
Frequently Asked Questions
What is the difference between a 3-season and a 4-season tent?
A 3-season tent works for spring, summer, and fall. It uses mesh panels for ventilation and handles rain and moderate wind. A 4-season tent is built for snow and high wind.
It uses solid fabric panels and stronger poles. A 4-season tent sleeps hot in summer and weighs more.
How much should I spend on a tent?
For occasional car camping, $100 to $200 is fine. For regular backpacking, plan to spend $250 to $400. For ultralight backpacking or winter camping, expect $400 to $800.
You pay for lighter weight, better materials, and more reliable construction.
Do I really need a tent footprint?
Yes. A footprint protects your tent floor from punctures, abrasion, and moisture. It extends the life of your tent and keeps it cleaner.
Budget tents often skip them. Buy one from the manufacturer or cut a sheet of polycryo to size. Your tent floor will last much longer.
Can I use a 3-season tent in winter?
Not safely. A 3-season tent cannot handle snow loads or sustained high winds. The mesh panels let cold air in.
The poles may snap under snow weight. Winter camping requires a 4-season tent with proper pole structure and solid fabric panels.
Should I buy a 2-person tent for solo camping?
Yes. A 2-person tent for solo use gives you room for gear and space to move. A 1-person tent fits you and nothing else.
The extra floor space is worth the small weight penalty. You will sleep better with your pack inside the tent.
How long does a tent last?
A well-maintained tent lasts 5 to 10 years of regular use. Store it dry and loose. Keep it out of direct sun when not in use.
Replace broken poles and worn stakes. A quality tent from a reputable manufacturer can last through hundreds of nights with proper care.