How to Make Tent Camping More Comfortable for Beginners
You’ve been there. You crawl into your tent after a long day, ready for a great night’s sleep. Then the ground feels like concrete, and you’re cold despite your sleeping bag.
If you’re wondering how to make tent camping more comfortable, the problem usually isn’t your tent. It’s your sleep system.
Manufacturer specifications confirm that a sleeping pad with an R-value below 2.0 loses most of its insulating power on cold ground. Per ASTM testing standards, the right combination of pad thickness and insulation makes the biggest difference in sleep quality. Let’s walk through what actually works for your specific sleep style and camping conditions.
Quick Answer
Comfort starts with your sleep system. Choose a pad thick enough for your sleeping position. Match your bag’s temperature rating to the conditions.
Add a proper pillow. Set up on level ground. Ventilate your tent to control condensation.
These five steps fix most comfort problems.
Why Your Camping Comfort Usually Fails
Most people think comfort comes from a bigger tent or a fancier sleeping bag. The real culprit is almost always the ground. Your body loses heat fast when there’s nothing between you and the cold earth.
Even a thick sleeping bag gets compressed underneath you. It loses its insulation right where you need it most.
Then there’s the sleeping position problem. Side sleepers need a pad at least 3 inches thick. Back sleepers can get away with 2 inches.
Stomach sleepers need a firm surface. Most budget pads come in at 1 to 1.5 inches. That’s why so many people wake up with sore hips and shoulders.
Condensation is another silent killer. You breathe out moisture all night. Without proper ventilation, that moisture collects on the tent walls.
It drips back onto your gear and your sleeping bag. A wet sleeping bag loses its insulating power fast.
The good news is that every one of these problems has a fix. And the fix doesn’t always cost a lot of money. Sometimes it’s as simple as choosing the right setup for your specific situation.
You just need to know what to look for.
The Quick Answer: Match Your Comfort Fix to Your Camping Style
Your camping style determines which comfort upgrades matter most. Here’s how to match your fix to your situation.
If You’re Car Camping
Weight doesn’t matter. You can bring a 4-inch thick pad or even a folding cot. A double-wide pad works great for couples.
You have the luxury of space. Take advantage of it.
If You’re Backpacking
Every ounce counts. Look for a pad that balances weight with thickness. A 2.5-inch inflatable pad weighs around 16 ounces.
That’s a good trade-off for most trips. We’ve seen the best lightweight sleeping pad for backpacking options that hit this sweet spot.
If You’re a Side Sleeper
You need a pad at least 3 inches thick. Look for pads with vertical baffles that keep your hips from bottoming out. Some pads have a higher R-value on one side.
You can flip them for warmer or cooler conditions.
If You’re Camping in Cold Weather
R-value is your priority. You need a pad rated at 4.0 or higher. Pair it with a bag rated 10 to 15 degrees below the expected low.
Proper cold protection is the difference between a great trip and a miserable one. Our complete guide on staying warm in a tent covers this in more detail.
If You’re Camping in Hot Weather
Focus on ventilation. A mesh tent with a rain fly that stays open lets air flow freely. Skip the insulated pad if you can.
It traps heat underneath you. A thin foam pad is often enough.
If You’re Camping with Family
Space matters most. A cabin tent with vertical walls gives you more usable room. Multiple sleeping pads or cots work well when you have room to spread out.
Everyone needs their own comfortable sleep system.
Here’s a quick reference table for different camping styles:
| Camping Style | Pad Priority | Recommended Thickness | Key Feature |
|---|---|---|---|
| Car camping | Comfort | 3-4 inches | Double-wide or cot |
| Backpacking | Weight | 2-2.5 inches | Packable size |
| Side sleeper | Thickness | 3+ inches | Vertical baffles |
| Cold weather | R-value | 2+ inches | R-value 4.0+ |
| Hot weather | Ventilation | 1-2 inches | Minimal insulation |
The Sleeping Pad Decision: Thickness, R-Value, and Your Sleeping Position
This is the most important gear decision you’ll make. Your sleeping pad does two things. It cushions your body from the ground.
It insulates you from heat loss. Both matter equally.
What Is R-Value?
R-value measures how well a pad resists heat transfer. A higher number means better insulation. As of 2026, the ASTM F3340 standard gives us reliable R-value ratings across all brands.
Here’s what the numbers mean for real-world camping:
- R-value 1.0 to 2.0: Summer only. Use when ground temps stay above 50°F.
- R-value 2.0 to 4.0: Three-season camping. Good for spring through fall.
- R-value 4.0 to 5.5: Cold weather. Works for freezing conditions.
- R-value 5.5 and above: Winter camping. Handles deep cold and snow.
How Thick Do You Need?
Your sleeping position determines the minimum thickness. The table below shows what works.
| Sleeping Position | Minimum Thickness | Recommended Thickness |
|---|---|---|
| Back sleeper | 2 inches | 2.5 inches |
| Side sleeper | 3 inches | 3.5 inches |
| Stomach sleeper | 1.5 inches | 2 inches |
| Combination sleeper | 2.5 inches | 3 inches |
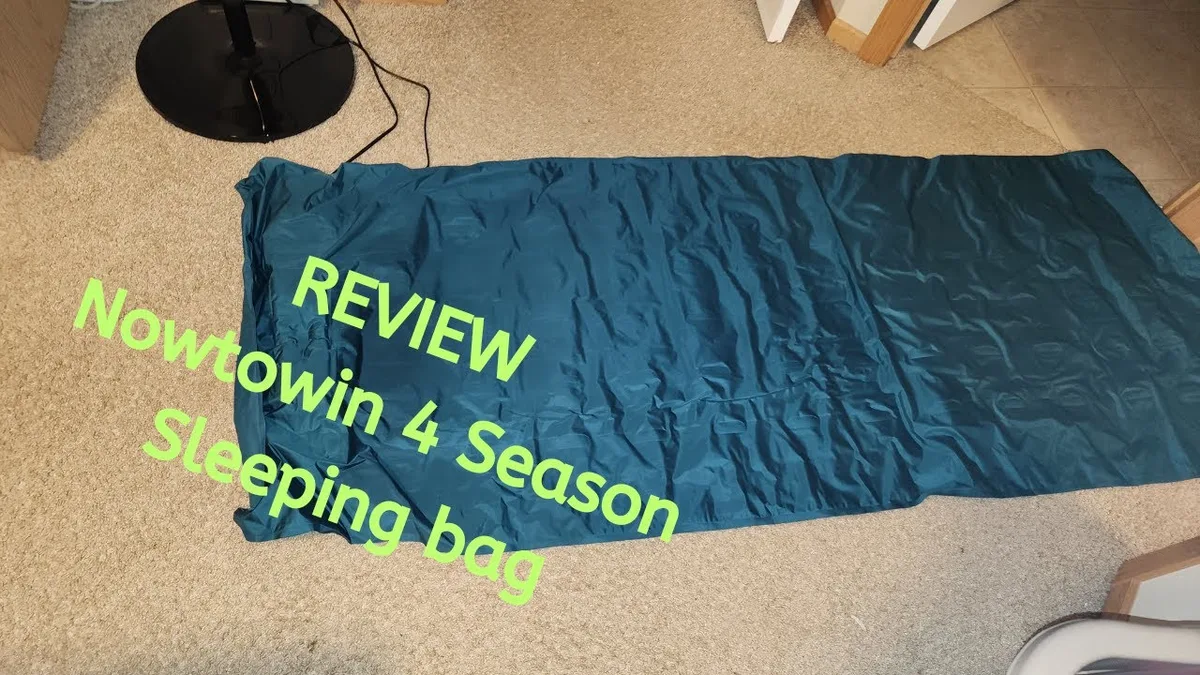
Image source: YouTube / Jayson and Anne Review it (YouTube thumbnail, fair-use with source credit)
Pad Types: Which One Is Right for You?
Inflatable pads offer the best comfort-to-weight ratio. They pack down small and provide excellent cushioning. The trade-off is that they can puncture.
Carry a repair kit.
Self-inflating pads have foam inside that expands when you open the valve. They’re more durable than pure inflatables. The foam adds insulation.
But they’re heavier and bulkier.
Closed-cell foam pads are the most durable option. They never puncture. They’re cheap and lightweight.
The downside is that they’re thin. Most are only 0.5 to 0.75 inches thick. Side sleepers will struggle with these.
The Decision Tree
If you sleep on your back and camp in mild weather, a 2-inch inflatable pad with an R-value of 2.5 works fine. If you sleep on your side and camp in cold weather, you need a 3.5-inch pad with an R-value of 4.5 or higher. If you’re a stomach sleeper who only camps in summer, a closed-cell foam pad might be enough.
Sleeping Bag or Quilt? Matching Insulation to Temperature and Sleep Style
Your sleeping bag or quilt works with your pad to keep you warm. The wrong choice leaves you either sweating or shivering.
Sleeping Bag Basics
Mummy bags are the most efficient design. They taper at the feet and hug your body. This reduces dead air space that your body has to heat.
Mummy bags are warmer for their weight. But some people find them restrictive.
Rectangular bags give you more room to move. You can unzip them fully and use them as a blanket. They’re common in car camping.
The downside is that they’re less efficient. You lose more heat to the open space inside.
When a Quilt Makes Sense
Quilts are essentially sleeping bags without a back. You save the weight of the fabric and insulation that would be compressed underneath you. The pad provides the insulation below.
Quilts work best for back sleepers who don’t toss and turn.
Here’s a comparison of the three options:
| Feature | Mummy Bag | Rectangular Bag | Quilt |
|---|---|---|---|
| Warmth | Best | Moderate | Good |
| Weight | Light | Heavy | Lightest |
| Room to move | Limited | Lots | Moderate |
| Best for | Cold weather, backpackers | Car camping, warm weather | Backpackers, warm sleepers |
| Price range | $100-$500 | $50-$200 | $150-$400 |
Temperature Ratings Explained
Bag ratings are not comfort ratings. A 20°F bag keeps you alive at 20°F. It keeps you comfortable at about 30°F.
The difference between the “lower limit” rating and the “comfort” rating is about 10 to 15 degrees.
If you’re a cold sleeper, buy a bag rated 15 degrees colder than the expected low. If you’re a warm sleeper, you can buy a bag rated closer to the actual temperature.
The Liner Trick
A sleeping bag liner adds 5 to 10 degrees of warmth. It also keeps your bag cleaner. Silk liners are lightest.
Fleece liners are warmest. Cotton liners are comfortable but heavy. For winter camping, a liner is almost mandatory.
The Decision Tree
If you camp in cold weather, go with a mummy bag rated 10 to 15 degrees below the expected low. If you sleep hot and move around, a rectangular bag or a quilt works better. If you’re backpacking and every ounce matters, a quilt paired with a high-R-value pad is the lightest setup.
The Pillow Problem: What Actually Stays in Place All Night
Pillows are the most overlooked comfort item. A bad pillow ruins your sleep. A good one makes all the difference.
Why Regular Pillows Don’t Work
Your bed pillow at home is too big for a sleeping bag. It takes up too much space. It slides off the pad.
It gets damp from condensation. And it’s heavy to carry. Most people end up tossing it aside by midnight.
The Camp Pillow Options
Inflatable pillows pack down to nothing. They’re light and cheap. The downside is that they feel like a balloon.
They’re noisy. And they slide around on the pad.
Compressible pillows stuff into a small pouch. They use foam or synthetic fill. They feel more like a real pillow.
They’re heavier than inflatables but much more comfortable.
Stuff-sack pillows are the most practical option. You fill a stuff sack with your extra clothes. You get a custom pillow that’s the right height for you.
It costs nothing extra. And it stays in place better than anything else.
How to Keep Your Pillow in Place
Pillow sliding is the number one complaint. Here’s what works:
- Look for a pad with a built-in pillow pocket.
- Use a pillow with a textured bottom that grips the pad.
- Put a thin layer of clothing between the pillow and the pad.
- Wear a hoodie with a pocket and stuff the pillow inside it.
The Decision Tree
If you’re a side sleeper, you need a tall pillow. A stuff sack filled with a fleece jacket works perfectly. If you’re a back sleeper, a thin inflatable pillow is enough.
If you’re a stomach sleeper, skip the pillow entirely. Or use the flattest option you can find.
If you’re backpacking, use the stuff-sack method. It saves weight and pack space. If you’re car camping, bring a compressible pillow.
It’s worth the extra bulk.
Tent Comfort: Size, Ventilation, and Floor Protection
Your tent does more than keep rain off your face. It creates the environment you sleep in. Get the size and airflow wrong, and nothing else matters.
How Much Space Do You Actually Need?
A two-person tent fits two sleeping pads side by side. That’s it. There’s no room for gear.
A three-person tent gives you space for pads plus a duffel bag at the foot. A four-person tent lets you sit up and change clothes comfortably.
If you’re car camping, buy one size larger than the occupancy rating. Couples should look at a three-person tent. Families should add one to two extra person slots.
The extra space makes a huge difference in comfort.
Ventilation Is Not Optional
Your body releases about a pint of moisture overnight. That moisture has to go somewhere. Without airflow, it condenses on the tent walls.
It drips onto your sleeping bag. It makes everything damp and cold.
Look for tents with mesh panels on the inner walls. Open the rain fly vents. Point the tent opening toward the prevailing breeze.
In hot weather, pitch the rain fly high to create a gap between the fly and the tent body.
Winter camping is different. You need to balance ventilation with heat retention. Crack the fly vent on the leeward side.
Keep the door closed. The goal is to let moisture escape without losing all your warmth.
Floor Protection Matters More Than You Think
Tent floors are thin. A 68-denier floor is standard for backpacking tents. A 150-denier floor is tougher but heavier.
Either way, a sharp rock or a pine cone can puncture it.
A footprint or ground cloth protects the floor. Use one that matches your tent’s shape. A tarp works in a pinch.
Fold it so it’s slightly smaller than the tent footprint. If the tarp sticks out, it collects rainwater and channels it under the tent.
Inside the tent, keep shoes in the vestibule. Sweep dirt and debris out before you crawl in. A small handheld broom or a bandana works for this.
Dirt inside the tent wears down the floor over time.
The Decision Tree
If you’re camping in warm weather, prioritize ventilation over floor protection. A mesh-heavy tent with a minimal rain fly is ideal. If you’re camping in wet weather, prioritize a full-coverage rain fly and a bathtub floor.
The floor should extend up the sides at least 4 inches. If you’re camping on rough ground, bring a thick footprint and inspect the site for sharp objects before pitching.
Site Selection and Setup: The Ground, the Wind, and the Rain Fly
You can have the best gear in the world. If you pitch your tent in a bad spot, you’ll be miserable. Site selection is a skill that improves with practice.
What to Look for in a Tent Site
Flat ground is the first priority. Walk the area before you pitch. Lie down on the spot if you have to.
You’ll feel the bumps and slopes that your eyes miss. A slope of more than 5 degrees makes sleep difficult.
Look up. Dead branches hanging overhead are widowmakers. They can fall in wind.
Avoid camping under them.
Drainage matters. Don’t pitch in a low spot where water collects. Look for signs of previous water flow.
Dried mud, debris lines, and compacted soil all indicate water runs through that area.
Wind Protection
Wind steals heat and makes tents flap. It’s noisy. It can damage your tent in strong gusts.
Pitch with the tent’s narrow end facing the wind. This reduces the surface area that wind hits. Use every guylines and stake.
Even if it’s calm now, wind can pick up at night.
If you’re camping in exposed areas, look for natural windbreaks. A ridge, a stand of trees, or a large rock can block the wind. Don’t pitch too close to these features.
They can create turbulence on the leeward side.
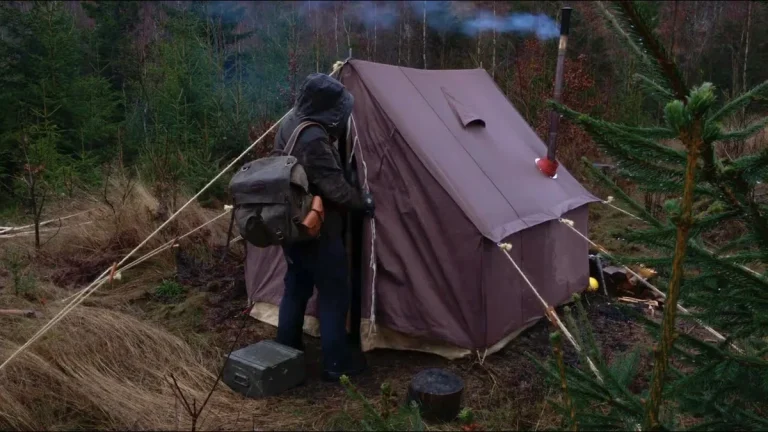
Rain Fly Setup
The rain fly is not just for rain. It creates a dead air space between the fly and the tent body. This air space provides insulation.
It also prevents condensation from dripping directly onto you.

Image source: YouTube / Nature’s Hangout (YouTube thumbnail, fair-use with source credit)
Pitch the rain fly taut. Loose fabric flapping in the wind can tear the tent. Make sure the fly extends past the tent floor on all sides.
This keeps rain from splashing under the tent.
Use the vestibule for gear storage. Keep your backpack and shoes under the fly. This frees up space inside the tent.
It also keeps your gear dry.
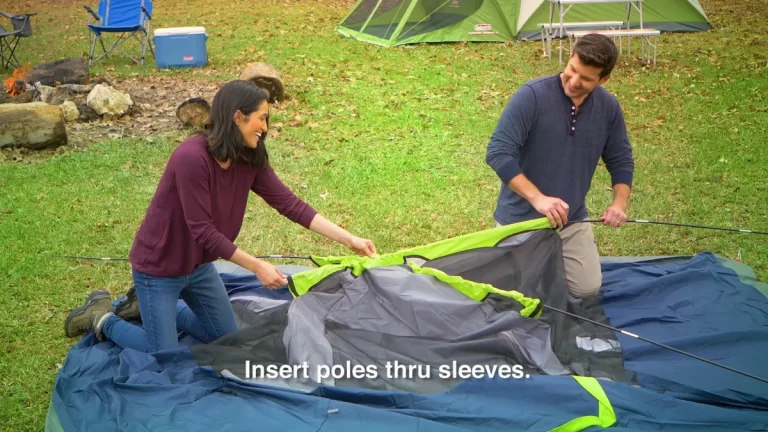
The Setup Sequence
Clear the site of rocks and sticks. Lay down the footprint. Pitch the tent body.
Stake the corners. Attach the rain fly. Adjust the guylines.
This sequence takes about 10 minutes with practice. A proper setup is outlined in a step-by-step tent pitching guide.
Extras That Actually Make a Difference: Lighting, Seating, and Organization
Comfort goes beyond the sleep system. Small upgrades make your campsite feel like home.
Lighting
A headlamp is essential. It keeps your hands free. Look for one with a red light mode.
Red light doesn’t ruin your night vision. It’s less likely to attract bugs.
A lantern creates ambient light. Hang it from the tent ceiling. This makes the tent feel bigger.
It’s easier to find things at night. A dimmable lantern lets you adjust the brightness.
Seating
A camp chair changes the whole experience. Sitting on the ground gets old fast. A low-back camp chair is fine for short sits.
A high-back chair with armrests is better for longer relaxation.
If you’re backpacking, a lightweight camp stool or a sit pad works. You don’t need a full chair. You just need something that keeps your butt off the ground.
Organization
Clutter makes a small tent feel smaller. Use gear lofts for storing small items. Use stuff sacks to organize your gear.
Keep your headlamp and phone within reach at night.
A small rug or mat at the tent entrance catches dirt. It gives you a clean place to sit while taking off shoes. Some campers use a foam tile mat for this.
Common Comfort Killers and How to Fix Them
Some problems show up on every trip. Here’s how to fix them.
Condensation
Wipe down the tent walls with a microfiber cloth before you pack up. If you ignore it, everything gets wet. Prevent condensation by keeping the tent ventilated.
In cold weather, crack the fly vent.
Noise
Flapping tent fabric keeps you awake. Tighten the guylines. Use earplugs if you’re a light sleeper.
A white noise app on your phone also helps.
Temperature Swings
Layers are the answer. Sleep in a base layer. Add a mid layer if you get cold.
Remove layers if you get hot. A sleeping bag liner adds warmth without the bulk.
Bugs
Check your tent mesh for holes before you leave. Use a small repair patch for any tears. Keep the tent zipped unless you’re entering or exiting.
A bug net around your face helps if you sleep with the tent open.
Bad Ground
If the site is rocky or rooty, move. If you can’t move, use a thick pad. A closed-cell foam pad under an inflatable pad adds protection.
It also adds insulation.
Your Personal Comfort Decision Guide: A Quick Checklist
Use this checklist before every trip. It takes two minutes. It saves you a night of bad sleep.
Sleep System
- Pad R-value matches the expected low temperature
- Pad thickness matches your sleeping position
- Bag temperature rating is 10-15 degrees below the low
- Pillow is the right height for your sleep style
Tent Setup
- Site is flat and well-drained
- Tent is oriented with the narrow end toward the wind
- Rain fly is taut and properly ventilated
- Footprint is slightly smaller than the tent floor
Comfort Extras
- Headlamp with red light mode packed
- Camp chair or sit pad packed
- Earplugs or sleep mask if needed
- Warm layers for sleeping
Weather Check
- Forecast checked for the entire trip
- Rain gear is accessible
- Extra stakes and guylines packed for wind
Frequently Asked Questions
How do I make a tent more comfortable for sleeping?
Focus on the ground. A thick sleeping pad with the right R-value for the conditions makes the biggest difference. Add a proper pillow and a sleeping bag rated for the temperature.
These three items solve most comfort issues.
What is the best sleeping pad for tent camping?
It depends on your camping style. Car campers should pick a 3 to 4 inch thick pad with an R-value of 4.0 or higher. Backpackers should pick a lightweight inflatable pad around 2.5 inches thick.
Side sleepers need at least 3 inches of thickness.
How do I keep warm in a tent at night?
Use a sleeping pad with an R-value above 4.0 for cold weather. Pair it with a bag rated 10 to 15 degrees below the expected low. Wear a base layer and a hat.
Use a sleeping bag liner. Stay warm from the ground up.
How do I stop condensation in my tent?
Ventilate the tent. Open the rain fly vents. Point the tent opening toward the breeze.
In cold weather, crack the vent on the leeward side. Wipe condensation off the walls before packing up.
Should I get a tent that is bigger than the occupancy rating?
Yes, for car camping. A two-person tent fits two pads with no extra space. A three-person tent gives you room for gear.
Families should add one to two extra person slots for comfort.
What is the most important comfort upgrade for tent camping?
A high-quality sleeping pad. It provides cushioning and insulation. Most complaints about camping comfort trace back to the pad.
Get the right pad for your sleeping position and conditions. Everything else is secondary.