How to Use Camping Coffee Pot: Step-by-Step Guide
When you’re out enjoying the fresh air and need that crucial first cup of coffee, knowing how to use a camping coffee pot is essential. It’s not just about brewing; it’s about a reliable morning ritual that keeps you going, no matter how far from civilization you are. Many campers depend on these simple, sturdy devices for a satisfying brew.
Manufacturer specifications indicate that most stovetop percolators are designed for durability and ease of use on various heat sources. Yet, the nuances of getting the perfect cup can trip up beginners. Let’s break down the visual steps involved to ensure your coffee is as good as the view.
Why You Need to See It: Camping Coffee Pot Visuals
The real magic of brewing with a camping coffee pot happens in the details you can see. It’s one thing to read instructions, but quite another to watch how the water bubbles, how the grounds are contained, and when that rich, dark stream starts to flow. Visual cues tell you when it’s working right, and more importantly, when something might be off.
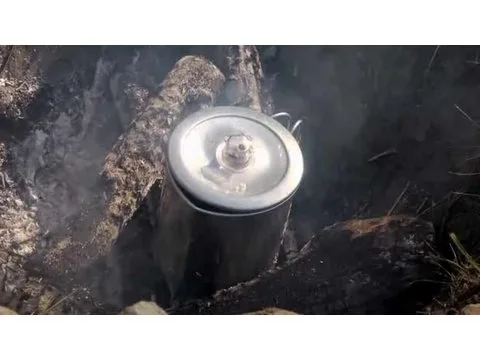
These visual indicators prevent common pitfalls like over-extraction, which leads to bitter coffee, or under-extraction, resulting in weak, watery grounds. Understanding what you’re looking for, the exact stage of the brew cycle, is key to consistent, delicious results every time. This guide will point out those critical visual checkpoints.
Quick Answer: How to Use a Camping Coffee Pot
Brew coffee by adding water to the base, coffee grounds to the basket, and assembling the pot. Heat the assembled pot on a stove or campfire until coffee percolates. Remove from heat, let it sit briefly, then pour.
Always clean thoroughly after use.
Quick Look: Your Camping Coffee Pot’s Main Parts
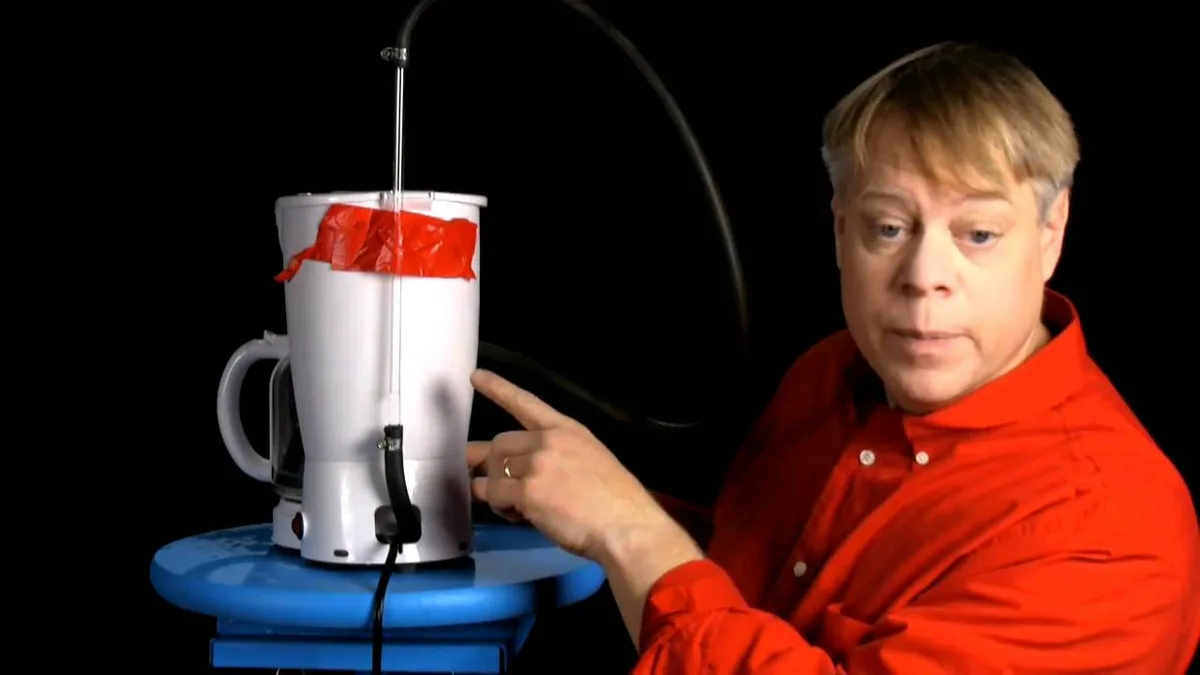
Most camping coffee pots, especially stovetop percolators, share a similar set of essential components. Understanding these parts is the first step to mastering their use. These pots are typically made from durable materials like stainless steel or aluminum, built to withstand outdoor conditions.
Here’s a breakdown of what you’ll find:
- Base: This is where the water goes. The bottom is designed to sit stable on your heat source.
- Stem: A hollow tube that screws into the basket or sits below it. It draws hot water up from the base.
- Coffee Basket: This perforated container holds your coffee grounds. It usually sits on top of the stem.
- Lid: Covers the top of the pot, often with a clear knob so you can see the percolation action.
- Spout: Designed for pouring the brewed coffee.
- Handle: For safe carrying and pouring.
Knowing these pieces helps you assemble the pot correctly for brewing and disassemble it for cleaning.
The Classic Camping Coffee Pot Process: Step-by-Step Visuals
Brewing coffee in a camping percolator is a straightforward process, but paying attention to the visual steps ensures the best flavor. This method relies on circulating hot water through coffee grounds to extract their essence. As of 2026, this remains a popular choice for its simplicity and robust design.
Step 1: Coffee Pot Prep and Water Fill
First things first, make sure your camping coffee pot is clean. Even a quick rinse is better than nothing if you’re in a hurry. You’ll want to fill the base of the pot with cold, fresh water.
This is the primary liquid that will heat up and drive the brewing process.
- Visual Cue: Look for a fill line inside the pot, or fill it to about an inch below where the basket would sit. Don’t overfill, or the water might boil out when heating.
Step 2: Adding the Grounds
Next, place your coffee grounds into the coffee basket. The type of grind matters. For percolators, a medium grind is generally best.
Too fine a grind can slip through the basket and end up in your coffee.
- Visual Cue: Fill the basket loosely, but don’t pack it down. About two-thirds full is usually a good starting point. The grounds should form a nice, even bed.
Step 3: Assembly and Ignition
Now, assemble the pot. Screw the stem into the basket (if it separates), then place the basket over the stem. Finally, place the lid firmly onto the pot.
Ensure everything is secure. Then, place the coffee pot on your heat source, be it a camping stove or a carefully managed campfire.
- Visual Cue: The stem should sit snugly in the base, and the basket should rest evenly on top of it. The lid should fit securely to trap the steam and heat.
Step 4: Brewing and Watching the Magic
This is where the visuals really come into play. As the water heats, steam will rise through the stem and force hot water out the top. This hot water then cascades down over the coffee grounds in the basket, extracting the coffee flavor.
- Visual Cue: Watch the clear knob on the lid (if your pot has one). You’ll see dark liquid start to bubble up through it. This is percolation. The bubbling should be steady, not violent. If it’s sputtering aggressively, your heat is too high.
Step 5: Pouring and Enjoying Your Brew
Once the coffee has perked to your liking, usually between 5 to 10 minutes depending on heat and pot size, carefully remove the pot from the heat source. Let it sit for a minute or two off the heat. This allows the grounds to settle a bit and stops the brewing process.
- Visual Cue: After percolation slows to an occasional drip or stops, it’s time to pour. The liquid in the lid knob should be a rich, dark brown.
Step 6: Cleaning Up Your Pot
Cleaning your camping coffee pot immediately after use is the best way to prevent coffee oils from building up and affecting future brews. Disassemble all the parts and rinse them thoroughly with warm water. For tougher stains, a gentle scrub brush can help.

- Visual Cue: After rinsing, turn the pot upside down on a drying rack or clean surface. Ensure all nooks and crannies are dry before storing to avoid rust.
Spotting Trouble: Common Visual Mistakes to Avoid
When using a camping coffee pot, a few common mistakes can lead to a disappointing cup. Most of these can be spotted and corrected simply by paying attention to what you see during the brewing process. Avoiding these will significantly improve your coffee experience outdoors.
- Overfilling the Water: If you fill the pot too high with water, it can bubble over the rim when it heats up, making a mess and reducing your brew volume.
- Visual Check: Ensure the water level stays below the bottom of the coffee basket.
- Grounds Escaping the Basket: Using coffee that’s too finely ground or overfilling the basket can cause grounds to seep through the perforations.
- Visual Check: You might see a muddy stream instead of clear coffee bubbling in the lid’s clear knob, or grounds settling at the bottom of the pot.
- Stove Too Hot: A flame that’s too high can scorch the coffee or make the metal pot itself dangerously hot to handle. It can also cause the water to boil too rapidly, leading to sputtering and uneven brewing.
- Visual Check: The flame should be controlled, only slightly larger than the base of the coffee pot. If the coffee is violently bubbling, turn the heat down.
- Not Letting it Rest: Pouring immediately after percolation stops can result in a more bitter taste as the brewing process hasn’t fully stabilized.
- Visual Check: Wait for the bubbling in the lid to cease completely and give it a minute or two before pouring.
- Improper Cleaning: Leaving coffee residue in the pot leads to old oils and bitter tastes.
- Visual Check: After cleaning, inspect the pot for any lingering dark spots or residues. Ensure it’s bone dry before storage.
Keeping Your Pot in Prime Condition: Visual Maintenance Tips
To ensure your camping coffee pot lasts for years and continues to brew great coffee, proper maintenance is key. Much of this involves visual checks and regular care. These machines are built tough, but a little attention goes a long way, especially for metal components that can corrode if neglected.
- Regular Rinsing and Drying: After every use, rinse all parts with warm water. Don’t just swish it around; get into every crevice. Then, ensure every part is thoroughly dried, inside and out, before storage. Condensation can lead to rust spots, particularly on aluminum or unseasoned cast iron pots.
- Visual Check: Look for water droplets or streaks inside the pot or on the metal surfaces. A clean, dry pot looks shiny and free of discoloration.
- Deep Cleaning (When Needed): If you notice buildup or a persistent metallic or stale coffee taste, a deeper clean is necessary. This might involve a gentle scrub with a non-abrasive sponge and dish soap, or for tougher stains, a specialized coffee pot cleaner, often available from camping gear suppliers. Always rinse thoroughly afterwards.
- Visual Check: Look for dullness or darkening on the metal, especially around the spout or inside the lid. A clean pot should look bright.
- Checking Components: Periodically, give the stem, basket, and lid a visual inspection. Make sure there are no cracks, large dents, or significant warping that could affect how the pot seals or functions. The stem should screw in smoothly, and the basket should sit level.
- Visual Check: Ensure the stem’s threads are clean and undamaged. The basket should fit evenly without wobbling.
- Rust Prevention: If your pot is stainless steel or aluminum, rust is less of a concern, but discoloration can still occur. For cast iron pots, proper seasoning is critical. This involves applying a thin layer of cooking oil and heating it, a process that darkens and protects the metal. Regular visual inspection helps catch any early signs of rust.
- Visual Check: Look for reddish-brown spots on cast iron. For other metals, check for dull patches or streaks that indicate oxidation. Proper seasoning creates a smooth, dark, slightly glossy finish on cast iron.
Different Camping Coffee Pots: What They Look Like and How They Work
While the classic stovetop percolator is a mainstay, other types of coffee makers are popular for camping and offer different brewing experiences. Each has its own visual characteristics and operational style, making them suitable for various preferences and situations like making a hot beverage during chiefs training camp. Understanding these differences helps you choose the right tool for your outdoor adventures.
-
Stovetop Percolator: This is the type we’ve focused on. It uses steam and gravity to cycle hot water through coffee grounds repeatedly. It’s known for its durability and ability to make a robust cup.
-
Camping French Press: Similar to home French presses, these are often made from durable, insulated materials. Coffee grounds are steeped in hot water, and then a plunger pushes the grounds to the bottom.
- Visual: Look for a cylindrical carafe, often with a plunger mechanism and filter screen on top.
- Best For: Those who prefer a fuller-bodied coffee with more oils and sediment; requires a bit more care in cleaning.
-
Portable Pour-Over Dripper: These are lightweight, compact cones that hold a paper or metal filter and coffee grounds. Hot water is poured slowly over the grounds, dripping directly into your mug.
- Visual: A simple cone shape, often made of plastic, silicone, or metal, with holes or ridges for water flow.
- Best For: Lightweight backpacking; offers a cleaner, brighter cup; requires careful pouring technique.
-
Moka Pot (Stovetop Espresso Maker): While technically making a strong, espresso-like coffee, Moka pots are often used at campsites for a potent brew. Water in the base heats, creating steam pressure that forces water up through coffee grounds and into the upper chamber.
- Visual: A distinctive three-chambered metal pot.
- Best For: Fans of strong, concentrated coffee; requires careful heat management.
The choice between these often comes down to the type of coffee you like, how much weight you want to carry, and how much effort you’re willing to put into brewing and cleaning. If you’re looking for reliable overnight accommodations, checking out top budget camping tents worth your money can also be a starting point for your trip planning.
Who Needs This Kind of Coffee Pot?
The classic camping coffee pot, particularly the stovetop percolator, is a fantastic tool for a range of outdoor enthusiasts. It’s ideal for anyone who values a hot, fresh cup of coffee without the need for electricity or complex equipment. If you’re someone who finds comfort or necessity in that morning caffeine boost while surrounded by nature, this is likely for you.
- The Dedicated Camper: Whether you’re car camping, setting up at a campground, or venturing into more remote areas for tent camping, a reliable coffee maker is a must. It transforms a basic campsite into a more comfortable base, much like ensuring you have the best beds for camping in a tent.
- The Early Riser: For those who like to get an early start on their day’s hiking or exploration, a quick and easy coffee brew is essential.
- The Budget-Conscious Traveler: Owning a camping coffee pot is often much cheaper in the long run than constantly buying coffee when you’re on the go.
- The Preparedness Planner: Having a non-electric coffee maker is also a smart addition to emergency kits, ensuring you can still make a warm beverage even when power is out.
Essentially, if you enjoy coffee and spend time outdoors, a camping coffee pot offers a simple, effective solution for enjoying it away from home.
Safety First: Visual Warnings for Hot Pots and Fires
Handling a hot camping coffee pot requires caution, especially when working with open flames or portable stoves. The metal can become extremely hot, posing a burn risk. Always assume the pot and its handle are too hot to touch directly.
- Visual Check: Notice the darkened or discolored metal on the handle and around the base of the pot, this indicates where the heat is most intense. Many pots have insulated handles, but even these can heat up over time. Keep a pot holder or thick glove handy.
- Campfire Precautions: If using a campfire, ensure the pot is stable on the coals or a grate. Never place it where it could easily tip over. Keep children and pets at a safe distance from the fire and the hot coffee pot.
Pro Tips for Perk-fect Camping Coffee (Visual Cues)
Achieving that perfect cup of camping coffee often comes down to mastering a few visual cues. These small details make a big difference in flavor and overall experience. Knowing what to look for can elevate your morning brew from “just okay” to truly exceptional, even in the wilderness.
- The Steady Bubble: As the coffee brews, keep an eye on the liquid in the lid’s transparent knob. You’re looking for a consistent, steady stream of dark coffee bubbling up. This indicates the water is heating and circulating properly. If it’s sputtering violently or only bubbling intermittently, it suggests the heat is either too high or too low. A slow, steady perking is your visual confirmation of a good brew.
- The Color Transition: The color of the liquid in the knob is your best indicator of brew strength. It starts darker and then gradually becomes lighter as the brewing continues and the grounds become less potent. Stop brewing when the coffee reaches your preferred depth of color, usually a rich, deep brown.
- Grounds Settling vs. Floating: After brewing, let the pot sit for a minute. You want to see any stray grounds quickly settle to the bottom. If grounds are still floating or clouding the coffee even after resting, your grind might be too fine, or the basket’s filter may be damaged. This visual cue tells you immediate pouring might result in a gritty cup.
- Steam as an Indicator: Beyond the lid’s knob, you might see steam gently escaping around the lid’s edges if it’s not sealed perfectly. This is normal, but excessive steam indicates the pot might be over-pressurized or the lid isn’t quite snug. Adjust heat accordingly.
- Preparing for Pouring: When you’re ready to pour, tilt the pot slowly. The coffee should flow smoothly from the spout. If it gurgles or hesitates, it means there might still be some steam pressure inside, or the spout is partially blocked. A smooth pour is a sign the coffee is ready.
Frequently Asked Questions
How long does it take to brew coffee in a camping pot?
Brewing time can vary, but most stovetop camping coffee pots take about 5 to 10 minutes to perk once placed on a medium heat source. Factors like the size of the pot, the heat intensity, and the coffee-to-water ratio all influence the exact duration. Visual cues, like the steady bubbling in the lid, are more important than a strict timer.
What kind of coffee grounds should I use for a camping percolator?
A medium grind is generally recommended for stovetop percolators. This consistency allows water to flow through freely without letting too many fine particles escape into your coffee. If your coffee comes out weak, you might need a slightly finer grind; if it’s too silty, try a coarser grind.
Can I use my camping coffee pot on a campfire?
Yes, absolutely. Many camping coffee pots are designed for campfire use. However, be extra careful with heat management.
Use a stable grate or place the pot on a bed of coals where heat is consistent and not too intense. Always use a pot holder or insulated glove, as campfire heat can be very uneven and intense, making metal parts extremely hot.
How do I ensure my coffee doesn’t taste bitter?
Avoid over-extraction by not letting the coffee perk for too long. Stop brewing once the coffee reaches your desired color, a steady, rich brown. Also, ensure your pot is clean; old coffee oils can impart a bitter taste.
Using fresh, cold water and a medium grind also helps improve the flavor.