Seal Your RV Roof: A Pro Guide
A little drip from your camper roof can quickly turn into a major problem. Understanding how to seal camper roof issues is key to protecting your investment and ensuring comfortable travels. Ignoring small leaks can lead to expensive repairs, mold growth, and damage to the interior of your RV.
We've looked into the common causes and solutions so you can tackle this common RV maintenance task with confidence.
Proper sealing is more than just covering a crack; it's about maintaining the integrity of your RV's protective shell against the elements. Manufacturers like Lippert Components, a major supplier of RV parts, emphasize regular roof inspections as part of preventative maintenance. This includes checking seams and sealants, which can degrade over time due to UV exposure and temperature fluctuations.
Quick Answer
Sealing your camper roof involves cleaning the affected area thoroughly and applying a compatible RV roof sealant. First, identify your roof material, EPDM, TPO, fiberglass, or metal. Then, choose a self-leveling lap sealant or a specialized tape sealant.
Clean the surface with isopropyl alcohol and apply the sealant generously, ensuring full coverage over cracks or seams. Allow it to cure completely for best results.
What Kind of Roof Does My RV Have?
Figuring out what your camper roof is made of is the first crucial step before grabbing any sealant. This isn't just about appearance; different materials require different treatments and specific types of sealants to ensure proper adhesion and a long-lasting seal. Using the wrong product can lead to premature failure, making the problem worse.
EPDM Rubber Roofs
EPDM (ethylene propylene diene monomer) is a common, durable synthetic rubber membrane roof material for RVs. It's typically white, though black versions exist, and it feels flexible, almost like a thick rubber mat. EPDM roofs are known for their resistance to UV rays and extreme temperatures, but they can become chalky or crack with age.
Aggregates of user reviews report that dedicated EPDM roof cleaners are best for preparing these surfaces before sealing.
TPO Rubber Roofs
TPO (thermoplastic polyolefin) is another popular synthetic membrane roofing material for campers. Like EPDM, it's often white and has a smooth, flexible surface. TPO is generally considered a bit more resistant to punctures and abrasions than EPDM, and it can be more resistant to certain chemicals.
Manufacturer specifications often highlight that TPO roofs require specific primers for certain sealing tapes to achieve optimal adhesion, which is a key difference from EPDM.
Fiberglass Roofs
Fiberglass roofs on RVs offer a hard, seamless surface that many owners appreciate for its durability and ease of cleaning. Unlike rubber membranes, fiberglass is rigid and smooth. It's less prone to tears but can be susceptible to cracking or damage from impacts, and UV exposure can cause chalking or fading over time if not properly protected.
Proper cleaning and the use of sealants compatible with fiberglass are vital for these types of roofs.
Metal Roofs
While less common on modern RVs than rubber or fiberglass, some campers, particularly older models or certain types of trailers, feature metal roofs. These are typically made of aluminum or steel, often with a painted or coated finish. Metal roofs can expand and contract significantly with temperature changes, so sealants must be flexible enough to accommodate this movement without cracking or pulling away.
Your RV Roof Repair & Sealing Options
When it comes to fixing your camper roof, you generally have two main paths you can take, depending on the extent of the damage or wear. Choosing the right approach will save you time, money, and a lot of frustration down the road.
Option 1: Patch It Up (Small Leaks)
This is your go-to for localized issues like a small crack, a loose seal around a vent, or a minor puncture. The goal here is to address the specific spot that’s causing the problem without a full roof overhaul.
Image source: YouTube / RV 101® (YouTube thumbnail (fair-use with source credit))
This approach is usually the fastest and most cost-effective for minor damage. You'll focus on cleaning the area meticulously and then applying an appropriate sealant directly to the compromised spot. Think of it like putting a bandage on a small cut.
This method relies heavily on selecting the exact right sealant for your roof material and ensuring it bonds well to the existing surface.
Option 2: Full Sealant Refresh (Aging Seals)
If your RV's roof seals are starting to look generally worn, dried out, or show small, widespread cracks, it might be time for a more comprehensive sealant refresh. This means re-sealing all the original seams and around every fixture on the roof.
This isn't typically about fixing one big leak, but rather about proactively addressing areas that are showing signs of age and are likely to fail soon. It’s a preventative measure to ensure the entire roof remains watertight. This method often involves cleaning the entire roof surface or at least all the seams and edges of fixtures.
Option 3: Major Patching (Tears & Damage)
When you're dealing with a larger tear in the roof membrane itself, significant delamination, or extensive damage that simple sealing won't cover, you move into the realm of major patching. This is a more involved repair that requires specialized materials and techniques. For instance, a significant rip in an EPDM roof might need a professionally manufactured patch kit to prevent water intrusion and maintain membrane integrity.
This type of repair is critical for preventing water from getting into the underlying structure of your RV. If you’re not comfortable with this level of repair, or if the damage is extensive, it’s often best to seek professional assistance rather than risk making the problem worse. For context, more complete roof replacements are detailed in guides on how to replace a roof on a camper.
Choosing the Right Sealant for Your RV Roof
Selecting the correct sealant is probably the most critical decision you’ll make when preparing to seal your camper roof. Using the wrong type can mean the sealant won't stick, won't flex with your roof, or could even damage it. Our research indicates that manufacturers have very specific recommendations based on roof material.
Sealants for EPDM & TPO Rubber
For EPDM and TPO rubber roofs, you typically want a flexible, weather-resistant sealant that can handle temperature changes and UV exposure.
- Lap Sealants: These are often self-leveling, meaning they spread out and fill gaps smoothly, making them ideal for seams and around roof penetrations like vents, skylights, and antenna mounts. Many popular brands offer specific lap sealants formulated for rubber roofs.
- Sealant Tapes: Products like Eternabond tape are incredibly effective for covering long seams, repairing tears, or reinforcing edges. They are a self-adhering, waterproof material that requires proper application techniques to ensure a strong bond.

Image source: YouTube / The DeCampers (YouTube thumbnail (fair-use with source credit))
Manufacturer specifications often recommend using a specific primer with these tapes, especially on TPO roofs, to ensure maximum adhesion. Always check if your roof material is EPDM or TPO, as the compatibility can vary.
Sealants for Fiberglass Roofs
Fiberglass roofs offer a different surface for sealants. While flexibility is still important due to expansion and contraction, the surface itself requires sealants formulated to bond well with fiberglass.
- Self-Leveling Sealants: Similar to rubber roofs, self-leveling sealants are a good choice for seams and around fixtures on fiberglass. They create a smooth, watertight barrier.
- Silicone-Based Sealants: Some high-quality, UV-resistant silicone sealants can work on fiberglass, provided they are specifically designed for exterior use and RV applications. However, standard hardware store silicone can sometimes cause adhesion issues for future repairs on other RV surfaces, so choose wisely.
Aggregate user reviews suggest confirming the sealant is rated for exterior use and is compatible with fiberglass.
Sealants for Metal Roofs
Metal roofs, often found on older campers, present their own set of challenges due to expansion and contraction.
- Flexible Sealants: The primary requirement for metal roofs is a sealant that remains flexible in a wide range of temperatures. Look for products specifically labeled for metal applications.
- Adhesion to Painted Surfaces: If your metal roof is painted, ensure the sealant is compatible with painted surfaces and won't lift or damage the existing finish.
What to Avoid (and Why)
There are certain types of sealants that you should steer clear of when working on your RV roof to prevent bigger problems later on.
- Standard Household/Construction Sealants: Many general-purpose sealants aren't designed to withstand the extreme temperature fluctuations, UV exposure, and constant movement that an RV roof experiences. They can crack, dry out, or fail quickly.
- Petroleum-Based Coatings: These can break down and damage rubber roof membranes, causing them to swell or degrade.
- Non-RV Specific Silicones: While some RV-specific silicones might work, generic silicone sealants can sometimes interfere with the adhesion of future RV-specific sealants. It’s always best to stick to products formulated for RV roof applications. Per standards bodies governing exterior coatings, proper compatibility is key for longevity.
Step-by-Step: Sealing Your Camper Roof Joints and Fixtures
Tackling the actual sealing process requires careful preparation and methodical application. This isn't a one-size-fits-all task; each step plays a crucial role in ensuring a watertight seal that lasts. Following these steps will help you achieve a professional-level result.
Step 1: Thorough Roof Cleaning & Prep
This is arguably the most important step. No sealant, no matter how good, will stick properly to a dirty, wet, or oxidized surface. Think of it like trying to glue two pieces of paper, if they're covered in dust, the glue won't hold.
- Remove Debris: Sweep or blow off any loose leaves, dirt, or debris from the entire roof surface.
- Wash the Roof: Use a dedicated RV roof cleaner or a mild detergent with plenty of water to wash the whole roof. Pay special attention to the areas around seams and fixtures where dirt tends to accumulate. Rinse thoroughly.
- Clean Sealing Areas: For the specific spots you'll be sealing (seams, around vents, etc.), clean them with isopropyl alcohol (90% or higher is best). This removes any remaining residue, oils, or chalking that could prevent adhesion.
- Ensure Dryness: Let the roof, especially the areas you've cleaned with alcohol, dry completely. This might take a few hours, depending on the weather. Don't rush this step; moisture is the enemy of good adhesion.
Step 2: Applying Lap Sealant
Lap sealant is your best friend for covering seams and sealing around protrusions. It's designed to flow and fill gaps, creating a continuous barrier.
- Choose Your Sealant: Make sure you have a self-leveling lap sealant compatible with your roof material.
- Prepare the Tube: If using a caulk tube, cut the tip to create an opening that’s about the size of the gap you need to fill.
- Apply a Generous Bead: Apply a thick, continuous bead of sealant over the entire seam or around the base of the fixture. You want to ensure the sealant completely covers the existing seal and extends slightly onto the surrounding roof material. Don't be stingy; poor coverage is the main reason for leaks.
- Smooth if Necessary: For a cleaner look and better contact, especially if the sealant isn't truly self-leveling, some find it helpful to gently smooth the bead with a gloved finger dipped in a bit of soapy water or using a putty knife. This ensures the sealant makes full contact with both surfaces.
Step 3: Using RV Roof Sealant Tape
Sealant tapes, like Eternabond, are a fantastic, durable option, especially for longer seams or repairs on rubber roofs. They create a strong, waterproof bond.
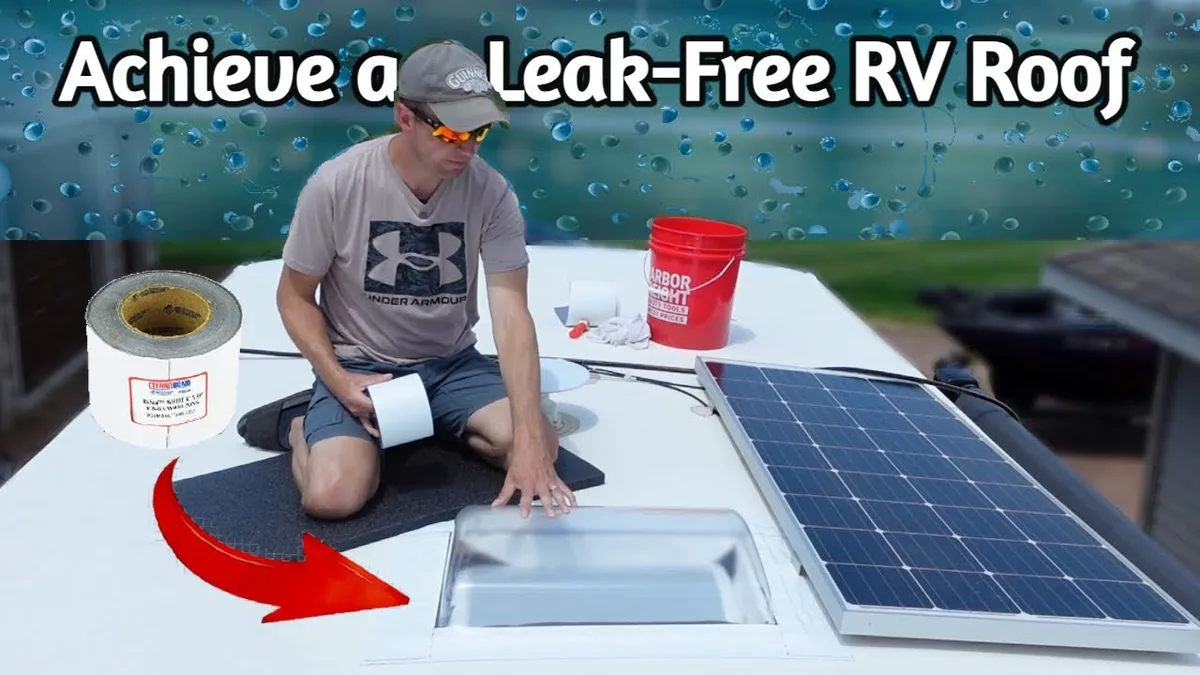
Image source: YouTube / Deano OutDoors (YouTube thumbnail (fair-use with source credit))
- Measure and Cut: Measure the length of the seam or area you need to cover and cut a piece of tape to size. It's often best to have the tape extend a few inches onto the roof material on either side of the seam for maximum adhesion.
- Apply Primer (If Recommended): For TPO or sometimes EPDM roofs, manufacturer recommendations for certain tapes may include applying a special primer to the seam area first. Follow the product instructions precisely.
- Peel and Stick: Start by peeling back a small section of the tape's backing paper. Align the tape carefully along the seam or edge.
- Press Firmly: As you apply the tape, press it down firmly and continuously. Use a small roller (often a specialized RV roof roller is recommended) to apply firm, even pressure. This is crucial for bonding the adhesive and eliminating air bubbles. Work the tape into corners and around any obstructions.
Protecting Your RV: Mistakes to Avoid When Sealing
Even with the best intentions, common mistakes can compromise your RV roof sealing efforts. Avoiding these pitfalls will save you from dealing with leaks down the line.
- Skipping the Cleaning: Applying sealant over dirt, grease, or old, flaking sealant is the number one reason for seal failure. Always clean, clean, and then clean some more. Isopropyl alcohol is your friend here, as it evaporates quickly and leaves no residue.
- Using the Wrong Sealant Type: Slapping any old caulk on your RV roof won't cut it. As we discussed, EPDM, TPO, and fiberglass all have specific needs. Using a standard exterior caulk might not be flexible enough or could actually damage rubber membranes.
- Not Enough Sealant: When in doubt, use more. A thin bead of sealant in a seam or around a fixture leaves a gap for water to infiltrate. You want a generous, continuous application that fully covers the joint.
- Rushing the Curing Process: Sealants need time to cure properly. Trying to run your RV through a car wash or expose it to heavy rain too soon after sealing can disrupt the bond. Always refer to the product's instructions for cure times, which can vary significantly. As of 2026, many premium sealants still require 24, 72 hours for full cure under ideal conditions.
- Ignoring Existing Conditions: If your roof membrane itself is ripped or severely degraded, just sealing the surface won't fix the underlying issue. Major structural damage requires more substantial repair or replacement, not just a sealant application.
When to Call in the RV Roof Repair Pros
While many camper roof sealing tasks are manageable DIY projects, there are times when bringing in experienced professionals is the smartest move. Knowing your limits and assessing the situation realistically can save you a lot of headache and prevent costly mistakes.
If you encounter a significant tear larger than a few inches, or if the roof membrane appears to be delaminating or has multiple large soft spots, it might be beyond a simple sealing job. Extensive damage can sometimes indicate water has already worked its way into the RV's structure, requiring a more involved repair that professionals are equipped to handle.
Additionally, if you're uncomfortable working at heights, or if your RV has a complex roof design with many intricate fixtures, hiring a professional ensures the job is done safely and correctly. For those looking to sell their RV, ensure it's in top condition, and a professional inspection and repair service can help boost its value, as detailed in guides on how to sell a used camper fast.
Keeping Your RV Roof in Top Shape: Maintenance Tips
Preventative maintenance is your best defense against costly roof repairs. A little bit of regular attention can go a long way in extending the life of your camper roof and preventing leaks.
- Regular Inspections: At least twice a year, preferably in spring and fall, get up on your roof (safely!) and do a thorough visual inspection. Look for any signs of cracking, peeling, or deteriorated sealant around seams, vents, air conditioners, antennae, and gutters.
- Clean Your Roof: Periodically wash your RV roof to remove dirt, tree sap, and other environmental contaminants that can degrade the sealant over time. Use an RV-specific roof cleaner.
- Address Small Issues Immediately: Don't wait for a small crack to turn into a leak. If you spot a tiny imperfection, take the time to clean it and apply a small amount of appropriate sealant right away. This proactive approach is far easier and cheaper than a major repair.
- Check Your Seals After Trips: After a long journey, especially if you've encountered heavy rain, wind, or extreme temperatures, it's wise to give your roof seals a quick check-over.
FAQs
### How long does it take for RV roof sealant to dry?
Drying times vary by product and environmental conditions. Most lap sealants are dry to the touch within a few hours. However, full curing can take 24 to 72 hours or even longer.
Always check the manufacturer's label for specific cure times.
### Can I seal my camper roof in cold weather?
It's generally not recommended. Most sealants require temperatures between 40°F (4°C) and 90°F (32°C) for proper application and curing. Cold weather can prevent the sealant from bonding correctly, leading to premature failure.
### How often should I inspect my RV roof for leaks?
Inspect your RV roof at least twice a year, ideally in the spring before travel season and in the fall before storing it. Keep an eye out for any signs of wear, damage, or cracking in the sealant.
### What's the difference between sealant and caulk for RV roofs?
While often used interchangeably, RV roof sealants are typically formulated with greater flexibility and UV resistance than standard household caulks. They are designed to withstand the extreme expansion and contraction RV roofs experience. Lap sealants are a common type of RV roof sealant.
### Is it safe to walk on my RV roof?
Yes, most RV roofs are designed to be walked on for maintenance. However, always exercise caution, especially if the roof is wet or dirty. Wear appropriate non-slip footwear and be aware of your footing around vents and other fixtures.
### Can I use silicone sealant on my RV rubber roof?
It's generally not advised to use standard silicone sealants on rubber RV roofs, as they can interfere with the adhesion of future RV-specific sealants and may not be compatible. Always opt for sealants explicitly designed for RV rubber roofs.