Can You Camp in a Tent in Winter? Complete Guide
Sure, you can camp in a tent in winter. It’s not a simple yes or no. The answer depends entirely on your gear, your experience, and the conditions you’re facing.
Without the right preparation, it’s genuinely dangerous. With the right approach, it’s one of the most rewarding experiences you can have outdoors.
Manufacturer specifications for four-season tents and winter-rated sleeping bags are designed for temperatures well below freezing. As of 2026, the industry standard for cold-weather gear has improved, but the physics of staying warm hasn’t changed. You need to understand both the equipment and how your own body responds to cold.
Let’s walk through what actually matters.
Amazon Best Seller Coleman Tents Coleman Sundome Tent.
Quick Answer
Yes, you can camp in a tent in winter. It requires a four-season tent, a sleeping bag rated for the expected low, and an insulated sleeping pad. You must also manage moisture, hydration, and calorie intake.
Without proper preparation, hypothermia is a real risk. With the right gear and knowledge, it’s safe and enjoyable.
Why This Isn’t a Simple Yes or No Question
Winter camping changes everything. It’s not just summer camping with more layers. The cold affects every piece of gear, every decision you make, and every movement you take.
Your tent behaves differently. Your sleeping bag loses insulation if it gets wet. Your water freezes overnight.
Your body burns more calories just to stay warm.
The real question isn’t “can you.” It’s “should you, given your specific situation.” If you’re car camping in a state park with temperatures around 20°F, and you have a proper four-season tent and a 0°F sleeping bag, the answer is yes. If you’re planning a backcountry trip in the Rockies with a three-season tent and a 40°F bag, the answer is no.
Three factors determine whether winter camping is safe for you:
- Your gear. Is it actually rated for the conditions? Not just “warm enough” but properly rated.
- Your experience. Have you ever slept in below-freezing temperatures? Do you know how to manage condensation?
- Your location. What’s the forecast? What’s the terrain? Are you in avalanche country?
We cover all three in detail below. If any of these are uncertain, you’re not ready.
What Actually Changes When You Camp in Winter
Winter camping isn’t just colder. It’s a fundamentally different environment. Here’s what changes.
Temperature swings are brutal. The difference between daytime and nighttime temperatures can be 30 to 40 degrees. You’ll be sweating while setting up camp and freezing two hours later. That’s where most beginners make mistakes.
You can’t just dress for the coldest part of the night. You need to dress for activity and rest separately.
Water behaves differently. Your water bottles will freeze overnight. Your fuel canisters will lose pressure. Your stove will struggle to light.
Snow is a source of water, but melting it takes fuel and time. You need to plan for all of this before you leave home.
Your body burns more energy. In cold weather, your metabolism works overtime to maintain core temperature. You need 20 to 40 percent more calories than you would in summer. Dehydration is also a hidden problem.
Cold suppresses your thirst response, so you don’t feel thirsty until you’re already dehydrated. And dehydration makes you colder faster.
Daylight is shorter. Winter days are short. You have less time to set up camp, cook dinner, and handle emergencies. You need to be efficient.
Setting up a tent in the dark in below-freezing temperatures is not fun. It’s dangerous.
The ground is hard and cold. You can’t drive stakes into frozen ground. You need snow stakes or deadman anchors. The ground also saps heat from your body faster than air.
That’s why the sleeping pad is more important than the sleeping bag. More on that in the next section.
The Gear That Keeps You Alive: Tents, Bags, and Pads
This is the core of winter camping. Without the right gear, you can’t stay safe. Period.
Let’s break down the three most critical pieces.
Four-Season Tents vs. Three-Season Tents in Snow
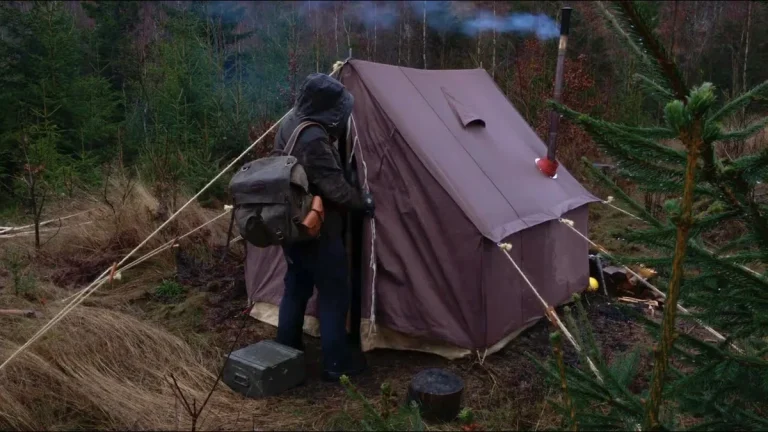
A four-season tent is designed for snow loads and wind. It has stronger poles, a sturdier frame, and often a snow skirt that blocks drafts. A three-season tent isn’t built for snow.
The poles can snap under the weight. The mesh panels let in wind. The rainfly doesn’t protect against drifting snow.
If you’re camping in actual winter conditions, you need a four-season tent. Period. There’s no shortcut.
Some people use a three-season tent with extra guylines and a footprint, but that’s a gamble. If the forecast calls for snow, don’t risk it.
Sleeping Bag Ratings: Comfort vs. Lower Limit vs. Survival
Sleeping bag ratings are confusing. Most manufacturers give three numbers:
- Comfort rating. The temperature at which a cold sleeper can stay warm. This is typically for women.
- Lower limit rating. The temperature at which a warm sleeper can stay warm. This is typically for men.
- Extreme rating. The temperature at which you can survive for six hours without hypothermia. This is not a comfort rating.
You should use the lower limit rating as your guide. If the forecast low is 20°F, get a bag rated to 0°F or lower. That gives you a buffer for wind, moisture, and personal variation.
R-Value: The Sleeping Pad Metric That Matters Most
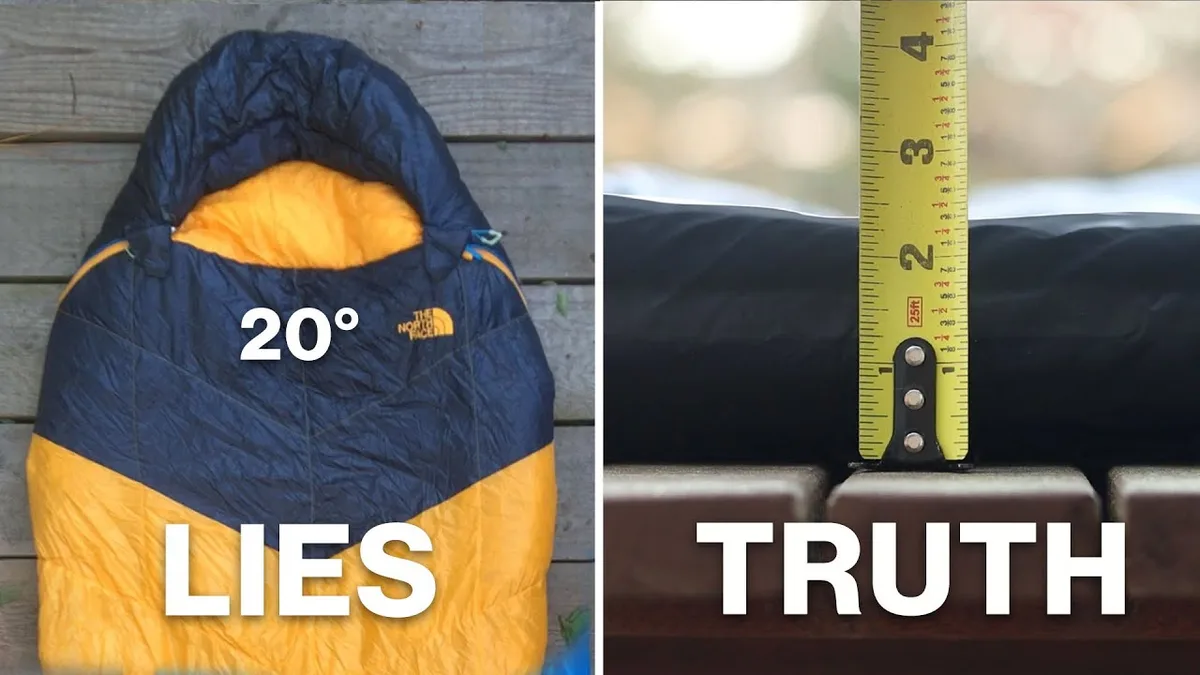
The sleeping pad is arguably more important than the sleeping bag. The ground is cold. It conducts heat away from your body.
A sleeping pad with an R-value of 4.0 or higher is recommended for winter camping. That’s the industry standard for insulating against frozen ground.
If you’re using a pad with an R-value of 2.0, you’ll feel the cold through the bag. You’ll be cold all night, no matter how good your sleeping bag is. For a reliable option, see our picks for the best lightweight sleeping pad for backpacking, which includes winter-rated options.
Your sleeping bag and pad work together. The bag traps your body heat. The pad prevents that heat from escaping into the ground.
If either one fails, you’re cold.
How Your Body Handles Cold (and Where It Fails)
Your body is designed to maintain a core temperature of 98.6°F. When it gets cold, it shunts blood away from your extremities to protect your organs. That’s why your fingers and toes get cold first.
That’s also where the real risks start.
Hypothermia: The Silent Risk
Hypothermia occurs when your core temperature drops below 95°F. The early signs are easy to miss. You start shivering.
You feel clumsy. Your speech becomes slurred. You might feel confused or disoriented.
The problem is that hypothermia sneaks up on you. You don’t suddenly feel cold. You just start making bad decisions.
You forgot to zip your tent. You leave your water bottle outside. You don’t notice that your hands are numb.
The best prevention is simple: stay dry, stay fed, stay hydrated. If you’re shivering, you’re already losing the battle. Stop what you’re doing, get warm, and eat something.
Frostbite and Exposed Skin
Frostbite happens when skin and underlying tissue freeze. It’s most common on fingers, toes, nose, ears, and cheeks. The early stage is frostnip, where the skin feels numb and looks pale.
If you catch it early, rewarming fixes it. If you don’t, the tissue dies.
The key is to check your skin regularly. If you’re out in the wind, cover your face. If your fingers feel numb, warm them up immediately.
Don’t rub them. Rubbing can damage frozen tissue. Best Tent for Backyard Camping.
Dehydration and Calorie Burn
Cold suppresses thirst. You don’t feel thirsty, so you don’t drink. But you’re losing water through respiration.
Every breath you exhale contains moisture. In cold, dry air, you lose more. You need to drink water even when you’re not thirsty.
Calories are fuel for heat. Your body burns more calories in cold weather. If you’re not eating enough, you’ll run out of energy.
You’ll feel colder. You’ll make poor decisions. Aim for 3,000 to 4,000 calories per day during winter camping.
That’s a lot. Plan accordingly.
The Real Risks Most Beginners Miss
Most beginners focus on cold. They think warmth is the only challenge. But three other risks are just as dangerous.
Condensation: Your Tent’s Hidden Enemy
Condensation is the number one problem in winter camping. Your body produces moisture through breathing and sweating. That moisture hits the cold tent walls and freezes.
By morning, you have ice inside your tent. If that ice melts, your gear gets wet.
Wet gear loses insulation. A wet sleeping bag is useless. A wet jacket is dangerous.
You need to manage condensation by ventilating your tent. Keep the vents open. Use a double-wall tent so the inner layer stays dry.
And never sleep with your face inside the bag. That pushes moisture directly into the insulation.
Carbon Monoxide from Stoves and Heaters
If you use a stove or heater inside your tent, you risk carbon monoxide poisoning. Carbon monoxide is odorless, colorless, and deadly. It builds up quickly in an enclosed space.
You won’t know it’s there until you start feeling dizzy, confused, or nauseous.
Never use a propane heater, a camp stove, or a charcoal grill inside a tent. If you’re using a wood stove, it must be a stove specifically designed for tents. You also need a carbon monoxide detector.
This is non-negotiable.
Avalanche Terrain and Snow Load
If you’re camping in the mountains, you need to understand avalanche risk. Avalanches kill people every year. Many of them are experienced winter campers.
The risk increases when you’re camping in a valley below a steep slope. Even a small avalanche can bury your tent.
Check the avalanche forecast before you go. Avoid slopes steeper than 30 degrees. Set up camp in the trees, not in open bowls.
And never camp at the base of a slope without understanding the terrain above you.
Snow load is another risk. Heavy snow can collapse your tent. If you’re using a four-season tent, it’s designed to handle snow.
But you still need to clear snow off the roof periodically. If the snow is wet and heavy, it’s even more dangerous.
Step-by-Step: Setting Up a Winter Camp That Works
Setting up camp in winter is different from summer. You have less daylight, colder hands, and frozen ground. Efficiency matters.
Here’s a sequence that works.
First, find the right spot. Look for a flat area protected from wind. Avoid valleys where cold air settles. Stay away from the base of steep slopes if there’s avalanche risk.
Trees break the wind and provide some overhead protection. But don’t camp directly under a snow-laden branch. It could dump on you in the night.
Second, clear the snow. You need a flat, packed platform. Stomp down an area slightly larger than your tent. Let it sit for a few minutes to firm up.
If the snow is deep, you can dig a shallow pit for your tent. This adds wind protection.
Third, set up your tent. Use snow stakes or deadman anchors. A deadman anchor is simple: tie a guyline to a stick, a stuff sack filled with snow, or a specialized snow stake. Bury it in the snow and pack it down.
The snow freezes around it overnight. It holds better than any standard stake.
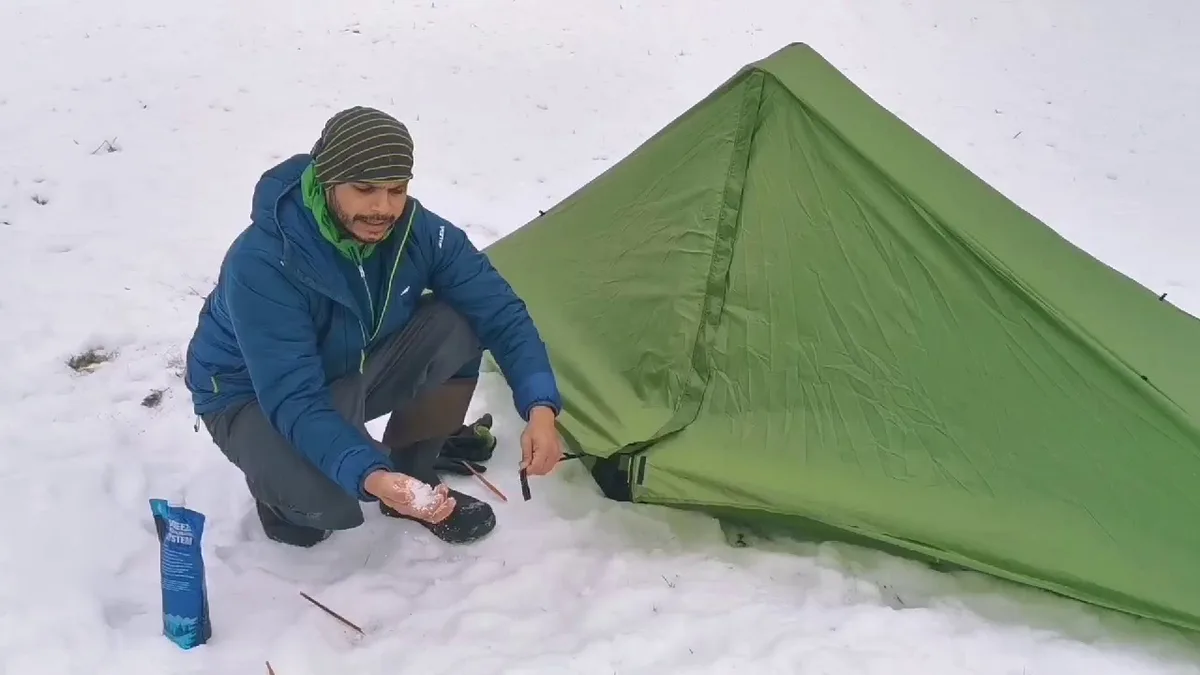
Fourth, organize your vestibule. The vestibule is your staging area. Wet gear goes outside the tent. Dry gear stays inside.
Keep your boots in the vestibule, not inside the tent. If they’re wet, they’ll freeze. If they’re inside, they’ll melt and wet your floor.
Fifth, set up your sleep system. Inflate your sleeping pad inside the tent. Lay out your sleeping bag. Put your water bottle in the bag with you so it doesn’t freeze.
Keep your clothes for the next day in the bag too. They’ll be warm when you put them on.
Staying Warm All Night: The Sleep System Strategy
Staying warm overnight is the hardest part of winter camping. It’s not just about the gear. It’s about how you use it.
Layering Your Sleeping Bag and Pad
Your sleeping pad is on the bottom. Your sleeping bag is on top. That’s the basic system.
But you can add layers.
If you have two sleeping pads, put the foam pad on the bottom and the inflatable pad on top. The foam pad adds insulation and protects the inflatable pad from punctures. The inflatable pad provides comfort.
Combined, the R-values add up.
Inside your sleeping bag, wear a base layer. Don’t sleep in your day clothes. They’re damp from activity.
Change into a dry base layer right before bed. Dry socks matter more than you’d think.
Pre-Warming and Vapor Barriers
A cold sleeping bag takes time to warm up. You can speed this up by pre-warming it. Fill a Nalgene bottle with hot water and put it in your bag twenty minutes before you climb in.
The bottle stays warm for hours. Just make sure the lid is tight.
A vapor barrier liner prevents moisture from your body from getting into your sleeping bag insulation. It’s a thin, waterproof layer between you and the bag. It feels clammy at first, but it keeps your insulation dry.
Dry insulation stays warm. Wet insulation is useless.
Managing Nighttime Bathroom Trips
Nobody wants to get out of a warm sleeping bag into the cold. But holding your urine all night makes you colder. Your body uses energy to keep that liquid warm.
You’re better off getting up, going quickly, and getting back in.
Keep a headlamp and boots right next to your tent door. Know where your zipper is. Practice the exit before you need it.
A well-organized camp makes a cold trip fast.
Common Winter Camping Mistakes (and How to Avoid Them)
Over-Layering and Sweating
This is the most common mistake beginners make. You start hiking in all your warm layers. You sweat.
That sweat freezes when you stop. Now you’re wet, cold, and in trouble.
The solution is simple: start cold. If you’re slightly chilly when you start moving, you’re dressed right. You’ll warm up within five minutes.
If you’re comfortable when you start, you’re overdressed. Strip a layer.
Ignoring Wind Chill and Weather Forecasts
Wind chill matters more than air temperature. A 20°F day with 20 mph wind feels like 5°F. That changes everything.
Your gear rating needs to account for wind, not just the thermometer.
Check the forecast before you go. Check it again the day before. Weather changes fast in the mountains.
If the forecast calls for a storm, postpone. Winter camping is not worth dying for.
Underestimating Hydration and Calories
You don’t feel thirsty in the cold. You don’t feel hungry either. But your body needs both.
Force yourself to drink water. Force yourself to eat.
Set a timer. Every hour, drink. Every meal, eat more than you think you need. Explore the Can You Rent a Camping Tent?
A 200-calorie snack before bed makes a difference. Your body burns those calories overnight to keep you warm.
Winter Camping Gear Checklist: What You Actually Need
The Non-Negotiables
| Item | Why It’s Essential |
|---|---|
| Four-season tent | Handles snow load and wind |
| Sleeping bag rated 10°F below expected low | Gives you a safety buffer |
| Sleeping pad with R-value 4.0+ | Prevents ground heat loss |
| Insulated water bottle | Stops water from freezing |
| Stove and fuel | Melts snow, cooks food |
| Headlamp with extra batteries | Short daylight hours |
| First aid kit with cold-specific items | Treats frostbite and hypothermia |
| Carbon monoxide detector | If using any stove inside a tent |
The Nice-to-Haves
- Hand warmers and foot warmers
- Hot water bottle for pre-warming the bag
- Vapor barrier liner
- Snow shovel for platform building
- Avalanche beacon, probe, and shovel (if in avalanche terrain)
- Satellite messenger or personal locator beacon
What You Can Leave at Home
- Cotton clothes. Cotton kills in winter. It holds moisture and loses insulation.
- Three-season tent. It’s not designed for snow.
- Summer sleeping bag. It won’t cut it.
- Heavy camp chair. It’s extra weight you don’t need.
When to Say No: Conditions That Make Winter Camping Unsafe
Winter camping is not for every situation. Sometimes the smartest move is to stay home.
Temperature Thresholds and Wind Chill
If the forecast low is below 0°F with wind chill, think twice. If it’s below -20°F, don’t go. No gear is designed for that.
You can’t stay warm indefinitely in those conditions.
Manufacturer specifications for sleeping bags and tents have limits. Respect them. If your bag is rated to 0°F and the forecast is -10°F, you’re not warm.
You’re a test subject.
Avalanche Danger and Snowpack Instability
If the avalanche forecast is “considerable” or higher, don’t camp in the backcountry. Period. Avalanches kill people every year.
Even experienced winter campers get caught.
Check the avalanche forecast from your local avalanche center. Know how to read terrain. If you’re not trained, stay on flat ground.
A winter camping trip in a state park is safer than a backcountry trip you’re not prepared for.
Solo Camping vs. Group Camping Risks
Solo winter camping is riskier than group camping. If something goes wrong, you have no backup. If you break a leg, you’re stuck.
If you get hypothermia, you might not realize it.
If you’re going solo, tell someone your exact route and return time. Carry a satellite messenger. And be honest with yourself about your experience level.
If you’re new to winter camping, go with a group first.
Quick Reference: Winter Camping Safety Summary
Hypothermia signs. Shivering, confusion, slurred speech, clumsiness. If you see these, get warm immediately. Remove wet layers.
Use a sleeping bag and warm drinks. Do not rub the skin.
Frostbite first aid. Rewarm frozen areas in warm water (104°F). Do not rub. Do not use direct heat.
If skin turns black or blisters, get medical help.
Carbon monoxide warning. Headache, dizziness, and nausea in a tent with a stove. Leave the tent immediately. Get fresh air.
Call 911 if symptoms persist.
Final Verdict: Is Winter Tent Camping for You?
Winter tent camping is a serious undertaking. It rewards preparation and punishes carelessness. If you have the right gear, the knowledge, and the respect for the cold, it offers solitude and beauty you can’t get any other way.
Start small. Try one night in a state park with a car nearby. Learn how your gear performs.
Then build up. The mountains will still be there next winter.
If you’re unsure, go with an experienced group. The learning curve is steep. But once you climb it, winter camping becomes a whole new world.