What Is a Wall Tent? Complete Beginner’s Guide
Choosing the right shelter is the difference between a miserable weekend and a successful wilderness expedition. If you need a structure that functions more like a portable cabin than a simple nylon dome, a heavy-duty canvas shelter is the ultimate solution.
But what is a wall tent, and how do you know if it fits your specific style of outdoor travel? Our research into backcountry basecamps reveals that these structures offer unparalleled comfort, durability, and weather resistance for extended stays in the wild. See Inflatable Tents for Camping.
As of 2026, outdoor enthusiasts continue to rely on these rugged shelters for hunting camps, seasonal work, and off-grid living. Understanding their unique materials, internal frame systems, and maintenance requirements will ensure you get the absolute most out of your investment.

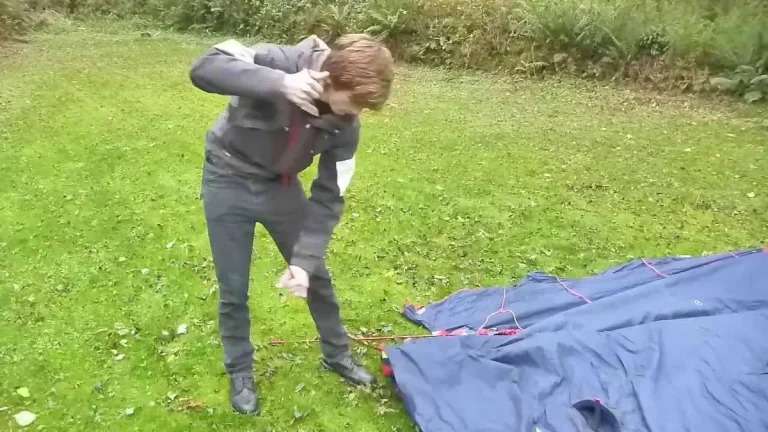
Image source: YouTube / Nagualero (YouTube thumbnail (fair-use with source credit))
Quick Answer
A wall tent is a heavy-duty, four-sided canvas shelter. It features vertical walls and a high, pitched roof. These vertical sides maximize interior head clearance.
Most models use thick cotton duck canvas. They rely on an internal metal frame for stability. They are built for extreme weather and wood-stove heating. Explore how to set up a tent for Camping.
Anatomy of a Classic Wall Tent: The Core Components
To understand why these structures are so highly regarded by wilderness guides, it helps to look at what they are made of. Every component is designed to handle high winds, heavy snow loads, and weeks of continuous exposure.
Cotton Duck Canvas: The Breathable Shield
The heart of any traditional wall tent is its fabric. Manufacturers typically use tight-weave cotton duck canvas, which naturally swells when wet to seal out rain. Modern tents often come pre-treated with water-repellent finishes, mold inhibitors, and fire-retardant chemicals that meet CPAI-84 flammability standards.
This heavy-duty fabric breathes naturally, allowing interior moisture from breathing and cooking to escape. This breathability is a massive advantage over synthetic fabrics, which trap condensation and leave the interior damp.
The Internal Frame: Steel vs. Aluminum EMT Conduit
A heavy canvas shell needs a serious skeleton. Most modern setups utilize an internal frame system. These frames are constructed from high-strength galvanized steel or structural aluminum EMT conduit.
The poles slide into welded steel corner brackets, creating a rigid cage. This robust skeleton ensures the tent can withstand heavy snow accumulation and howling winds that would easily crush a standard recreational shelter.
The Sod Cloth: Sealing Out the Elements
Run your eyes down to the bottom of the tent walls, and you will spot a strip of heavy-duty vinyl or PVC material. This is the sod cloth.
It extends roughly 6 to 12 inches beyond the bottom of the canvas. You fold this flap inward or outward along the ground, then weigh it down with dirt, rocks, or heavy logs. The sod cloth is essential for blocking freezing drafts, sealing out driving rain, and preventing curious rodents from slipping underneath your living space.
The Stove Jack: Your Winter Survival Port
One of the most defining characteristics of a wall tent is the stove jack. This is a designated, fire-resistant opening built into the roof or a side wall, usually made of silicone-coated fiberglass.

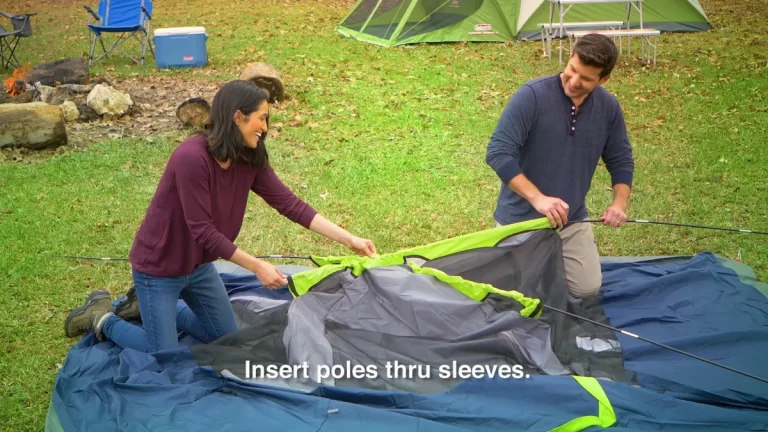
Image source: YouTube / TrekRevive (YouTube thumbnail (fair-use with source credit))
This port allows you to safely vent a metal chimney pipe from a wood-burning camp stove. With a stove running, you can easily maintain a warm, comfortable interior even when outdoor temperatures plummet below freezing. This feature is why many choosing this style of shelter can comfortably camp in a tent in winter.
Guylines, Tensioners, and Heavy-Duty Stakes
To keep the structure secure, you cannot rely on flimsy plastic stakes. Wall tents use heavy-duty steel pegs or concrete stakes to anchor the main body.
Thick polyester or nylon ropes run from the roof eaves to the ground, secured with metal or wooden tension sliders. Properly tensioned lines prevent the canvas from flapping in the wind, which reduces wear on the seams and fabric over time.
Wall Tents vs. Standard Camping Tents: Side-by-Side Comparison
How do these heavy-duty canvas cabins stack up against the typical synthetic tents found at average sporting goods stores? Our analysis highlights the stark functional differences.
| Feature | Classic Canvas Wall Tents | Standard Nylon/Polyester Tents |
|---|---|---|
| Primary Material | 10oz to 12oz cotton duck canvas | Thin nylon, polyester, or ripstop |
| Average Weight | 80 to 200+ lbs (with frame) | 5 to 30 lbs |
| Inner Microclimate | Highly breathable, stays warm in winter | Prone to condensation, cold in winter |
| Heater Compatibility | Safe for vented wood stoves | Limited to small, unvented propane heaters |
| Sturdiness | Excellent structural integrity | Moderate to poor in heavy wind and snow |
| Usable Workspace | High (full standing height up to the wall) | Low (sloped walls force crouching) |
| Lifespan | 20 to 30+ years with proper drying | 3 to 8 years under regular use |
As the comparison shows, the two types of shelters serve completely different styles of travel. While a backpacker would never dream of hauling a heavy canvas system, a wilderness basecamp demands the structural integrity that only canvas can provide. If you are new to camping, understanding these differences is a crucial part of learning how to choose a tent for your specific needs.
Alternatives to the Wall Tent: Finding Your Right Style of Shelter
If you love the idea of a heavy-duty, breathable shelter but are not sure if a traditional rectangular wall tent is the perfect fit, there are several worthy alternatives to consider.
Wall Tents vs. Bell Tents
Bell tents are circular, yurt-style shelters featuring a single center pole and a sloped A-frame doorway. They are incredibly popular for casual backyard setups and aesthetic glamping retreats.
While bell tents are much faster and easier for one person to pitch, they lack the vertical side walls of a wall tent. The sloped design means you lose usable headroom around the perimeter, making it harder to place large cots or cooking tables flush against the outer edges.
Wall Tents vs. Conical Tipis/Hot Tents
A conical tipi, or a modern lightweight hot tent, uses a simple pyramid or cone shape supported by a single center pole. Many of these tents are made from lightweight synthetic materials and include a stove jack for a portable wood stove.
They are highly prized by backcountry hunters who need to carry their gear on their backs. However, they offer very little usable headroom compared to a wall tent, and they cannot handle the same extreme snow loads over a long period.
Wall Tents vs. Modern Synthetic Cabin Tents
If you want maximum interior space but cannot manage the extreme weight of canvas, a synthetic cabin tent is a viable alternative. These tents use steel and fiberglass poles to create vertical walls, but they are made of nylon or polyester.
While they are excellent for warm-weather family trips, they lack the durability of cotton canvas. They cannot safely support a wood-burning stove, and they will deteriorate much faster under the sun’s harsh UV rays. If you want a fun backyard setup for the kids, a high-quality synthetic model is often one of the best tents for backyard camping.
Who is a Wall Tent Best For? (And Who Should Skip It)
Because of the specialized nature of these shelters, they are ideal for certain outdoor scenarios but completely impractical for others.
The Ideal User Profiles
If you plan to set up a basecamp in one location for a week or more at a time, a wall tent is incredibly hard to beat. They are the gold standard for:
- Late-Season Hunters: Having a warm, dry place to hang gear, cook meals, and sleep off the ground makes a massive difference during a grueling week-long hunt.
- Off-Grid Homesteaders: Many people use these durable structures as temporary living quarters while building a cabin or clearing land.
- Glamping Operators: The generous head clearance and rustic charm make these tents perfect for hosting paying guests who want a comfortable bed in the middle of nature.
- Outfitters and Guides: Professional backcountry guides use them season after season to house clients in remote mountain valleys.
When to Choose a Synthetic Tent Instead
You should look for a different style of shelter if your travel style involves moving to a new campsite every day. Because of the weight of the canvas and the internal frame, transportation requires a truck, utility trailer, pack horse, or ATV.
If you are a weekend car camper looking for quick setups or a backpacker hunting for a lightweight sleeping pad for backpacking, a traditional canvas tent will simply be too cumbersome to transport and pitch.
Crucial Pros and Cons of Canvas Wall Tents
Investing in a canvas shelter is a long-term commitment. Weighing the advantages and drawbacks honestly will help you make an informed decision.
The Advantages of Going to Canvas
- Unmatched Livability: With ceiling heights often reaching eight or nine feet at the ridge, you can easily stand upright, hang clotheslines, and organize your gear without feeling cramped.
- Decade-Spanning Durability: High-quality cotton canvas is exceptionally tough. With proper care, it resists tears, punctures, and UV degradation far better than synthetic alternatives.
- Superior Climate Control: The heavy fabric keeps the interior noticeably cooler under the hot summer sun, while retaining the dry heat of a wood stove during freezing winter nights.
- Excellent Breathability: You will not wake up to water droplets dripping from the ceiling. The natural fibers allow vapor to pass through, keeping the air inside feeling fresh and dry.
The Drawbacks to Keep in Mind
- Weight and Pack Volume: A complete setup, including the canvas, steel frame, stakes, and stove, can easily weigh over 150 pounds and take up a significant amount of bed space in a truck.
- Mandatory Drying Process: If you pack up a canvas tent while it is damp and store it away, mold and mildew will ruin the fabric within days. You must have a place to pitch or hang the tent to dry completely before long-term storage.
- Higher Initial Cost: A quality canvas setup is a serious investment. Between the premium fabric, the internal frame, and a wood stove, total costs can build quickly. If you are on a tight budget, you might want to look into whether you can rent a camping tent before purchasing your own.
Cost, Sizing, and Weight Specifications
To give you a realistic idea of what to expect, we compiled typical data for high-quality, professional-grade wall tents. Keep in mind that weights and prices will vary based on fabric thickness and customized features like extra windows or extended porches.
| Nominal Size (Feet) | Typical Wall Height | Ideal Occupancy (With Stove) | Average Weight (Canvas Only) | Estimated Frame Weight |
|---|---|---|---|---|
| $10 \times 12$ | 5 Feet | 1 to 2 People | 50 to 65 lbs | 40 to 50 lbs |
| $12 \times 14$ | 5 Feet | 2 to 3 People | 65 to 80 lbs | 50 to 65 lbs |
| $14 \times 16$ | 5 Feet | 3 to 4 People | 80 to 100 lbs | 65 to 80 lbs |
| $16 \times 20$ | 5 Feet | 5 to 6 People | 110 to 140 lbs | 85 to 110 lbs |
For those looking to maximize their comfort, choosing a model with 5-foot side walls instead of the traditional 4-foot walls makes a massive difference in usable floor space, as it allows you to place high sleeping cots right up against the outer walls. Knowing these details is just as important as knowing how to set up a tent for camping before you head out into the backcountry.
Essential Process: How to Set Up and Support a Wall Tent
Setting up a wall tent requires a systematic approach. While one strong person can manage it with practice, having a partner makes the process significantly faster and safer.

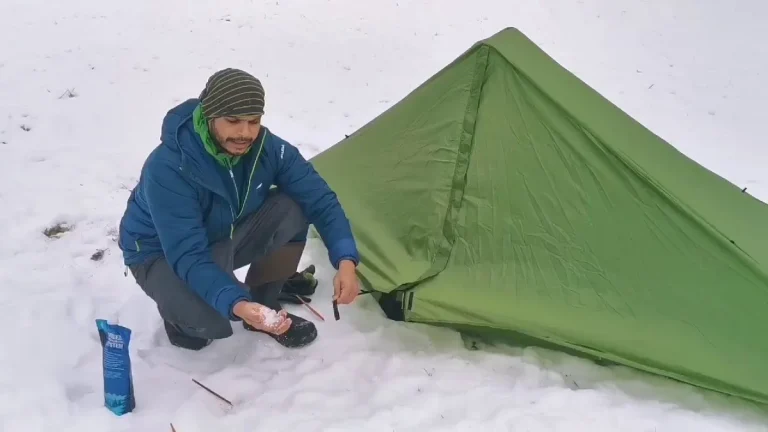
Image source: YouTube / Diamond Brand Gear (YouTube thumbnail (fair-use with source credit))
Step 1: Pre-Assemble and Layout the Roof
Clear a flat spot of all sharp rocks, roots, and debris. Layout your steel frame corner brackets and horizontal poles on the ground to match the shape of the roof.
Assemble the roof frame first, leaving the vertical leg poles detached for now. Lay your protective plastic ground tarp or floor directly under the frame if you are using one.
Step 2: Pitch the Canvas Over the Peak
Unroll your canvas carefully to avoid dragging it through mud or a sharp brush. Drape the canvas over the ridgepole and rafters of the roof frame, making sure the fabric is centered.
If your tent has a stove jack, ensure it is aligned correctly. Tie back the door flaps so they do not catch on the frame as you lift.
Step 3: Insert the Leg Poles and Lift
With the canvas resting on the roof frame, lift one side of the frame and insert the vertical leg poles into the corner brackets.
Once one side is standing, go to the other side, lift, and insert the remaining leg poles. Pull the canvas down evenly over all four corners of the newly raised frame.
Step 4: Angle Tensioning and Staking
Zip the doors shut to ensure the canvas does not pull out of shape. Drive your heavy-duty stakes into the ground at a 45-degree angle, roughly four to five feet away from the tent walls.
Attach your guylines to the eaves, run them to the stakes, and pull them taut using your tension sliders. The walls should be taut and straight, with no sagging in the roof. Secure the sod cloth along the bottom to block any drafts.
Step 5: Setting Up the Stove and Heat Shielding
If you are using a wood-burning camp stove, place it on a non-flammable heat mat or bare dirt. Keep the stove at least 18 to 24 inches away from the canvas walls.
Assemble your stovepipe section by section, ensuring the spark arrestor is securely attached to the very top of the pipe to keep hot embers off your roof. Carefully slide the pipe up through the heat-resistant stove jack.
Crucial Maintenance: Keeping Your Canvas Alive for Decades
A high-quality canvas tent is not a buy-and-forget product. It requires active care to prevent premature deterioration of the natural cotton fibers.
The Essential Seasoning Process (Before Your First Trip)
When you receive a brand-new canvas tent, you must season it before using it in the field. Set up the tent in your backyard on a dry day, then use a garden hose to thoroughly soak the entire canvas shell.
This moisture causes the dry cotton threads to swell and expand into the needle holes made during construction. Let the tent dry completely in the sun. This process pre-shrinks the fabric and seals the seams, ensuring it is completely waterproof for your first real storm.
The Deadly Sin of Wet Storage: Avoiding Mold and Dry Rot
Mold is the single biggest killer of canvas. If you must pack up your tent while it is raining, you must pitch it again or hang it up over rafters within 24 hours.
Let the canvas dry completely until it feels bone-dry to the touch. This applies to the guylines, mud flaps, and stitching as well. Storing canvas wet will lead to black mold and dry rot, which destroys the structural integrity of the fabric and ruins your investment.
Cleaning Off Creosote, Bird Droppings, and Sap
If you notice bird droppings, tree sap, or black creosote from your stove pipe on the canvas, let them dry completely first. Use a stiff-bristled brush to gently scrub away the dried debris.
Avoid using harsh household detergents or dish soaps, as they will strip away the protective water-repellent treatments. For stubborn spots, use a specialized canvas cleaner formulated to preserve the fabric’s natural water resistance.
Safety Warnings and Fire Mitigation
Living in a heated tent is incredibly cozy, but it comes with serious responsibilities. Safe practices prevent catastrophic accidents in remote areas where help is far away.
Spark Arrestors and Chimney Clearance
Never run a wood stove without a fine-mesh spark arrestor at the top of your stovepipe. Burning wood releases hot embers that can fly out of the chimney and land on your canvas roof, burning pinholes or starting a fire.
Additionally, ensure your stovepipe extends at least six inches above the ridge of your roof to keep smoke and sparks drifting away from the fabric.
Carbon Monoxide: The Silent Threat
Because modern wall tents can seal up very tightly, carbon monoxide poisoning is a real danger. Never sleep with a completely sealed tent while wood is burning in the stove.
Keep a window cracked slightly to ensure a constant supply of fresh oxygen. Always pack a battery-operated carbon monoxide detector and place it near your cot at sleeping height.
Common Mistakes to Avoid When Buying and Using a Wall Tent
- Buying Cheap Synthetic Frames: Avoid thin, flimsy frame poles. Ensure your angles are made of heavy-duty welded steel, and your poles are thick enough to withstand heavy, wet snow.
- Neglecting the Seasoning Step: Skipping the seasoning process means your first rainy night in the woods will likely involve annoying leaks along the seams.
- Improper Guyline Tension: Leaving the guylines loose allows winds to whip the canvas against the metal frame, which causes rapid wear, tearing, and structural damage.
- Packing the Tent Wet: Never store your tent in its storage bag if it has even a hint of moisture. Make sure it has dried completely in a well-ventilated area.
Final Decision Guide: How to Choose Your Setup
To choose the perfect wall tent for your needs, start by evaluating how you plan to transport it. If you have a truck or a trailer, a traditional cotton duck canvas tent with a galvanized steel frame will provide the ultimate heavy-duty experience.
Next, consider your typical group size. A $12\times14$ foot model is highly versatile, providing plenty of room for two or three adults, their gear, and a warm camp stove. For solitariness or small groups, the smaller $10\times12$ foot layout is much easier to manage and heat.
Lastly, make sure you have a designated, dry space at home to hang and air out the canvas after every single trip. Taking care of your canvas shell is the key to ensuring your portable cabin stands strong for decades of outdoor adventure. If you are just starting out, learning how to make tent camping more comfortable for beginners will help you transition into this incredible style of wilderness living.
Frequently Asked Questions
Can one person set up a wall tent?
Yes, one person can set up a wall tent, but it requires patience and a specific technique. You must assemble the roof frame first, drape the canvas over the peak, and then lift one side at a time to insert the vertical leg poles. Having a partner makes the process much quicker and safer.
Do wall tents need a floor?
Wall tents do not strictly need a sewn-in floor, and many traditional users prefer a dirt or grass floor, especially when using a wood stove. However, using a removable vinyl floor or a heavy-duty tarp under your cots keeps gear clean, blocks moisture, and helps seal out insects.
How long do canvas wall tents last?
With proper care, a high-quality cotton canvas wall tent can easily last 20 to 30 years. The key to longevity is ensuring the fabric is 100% dry before storing it away, which prevents mold, mildew, and dry rot from destroying the natural cotton fibers.
Are wall tents waterproof?
Yes, high-quality wall tents are highly waterproof. The tightly woven cotton duck canvas naturally swells when wet to repel water, and most modern tent manufacturers apply additional marine-grade water and ultraviolet light repellents to the fabric during construction.
Crucial Maintenance: Keeping Your Canvas Alive for Decades
Proper maintenance is the only way to preserve your investment. Our research shows that a well-kept canvas shell can easily outlast several generations of synthetic recreational shelters.
The Essential Seasoning Process (Before Your First Trip)
Seasoning is the process of pre-shrinking your tent to seal its seams. Set up the tent in your yard on a dry day, then use a garden hose to thoroughly soak the entire canvas shell.
As the cotton fibers absorb water, they swell and close up any tiny needle holes from the manufacturing process. Let the tent dry completely in the sun before packing it away.
The Deadly Sin of Wet Storage: Avoiding Mold and Dry Rot
Never pack a wet tent into its storage bag for more than a day. Mold and mildew can destroy the natural integrity of cotton duck canvas within 48 hours.
If you must pack up in the rain, pitch the tent again in a well-ventilated space at home immediately. Let the fabric dry until it is completely bone-dry to the touch.
Cleaning Off Creosote, Bird Droppings, and Sap
If you notice bird droppings, tree sap, or black creosote from your stove pipe on the canvas, let them dry completely first. Use a stiff-bristled brush to gently scrub away the dried debris without using harsh soaps.
Avoid using chemical detergents on your tent. These soaps strip away the protective water-repellent and fire-resistant treatments applied during manufacturing.
Safety Warnings and Fire Mitigation
Operating a wood-burning stove inside a fabric structure requires strict safety protocols. Taking a few basic precautions will protect your gear and your life in the backcountry.
Spark Arrestors and Chimney Clearance
Never run your camp stove without a fine-mesh spark arrestor at the top of your stovepipe. This screen catches hot embers before they can float out and land on your canvas roof.
In addition, verify that your stovepipe extends at least six inches above the roof ridge. These heights ensure that rising heat and stray sparks clear the canvas safely.
Carbon Monoxide: The Silent Threat
Because a well-pitched wall tent seals out drafts, carbon monoxide buildup is a genuine risk. Never sleep with a completely sealed tent while wood is burning in the stove. Explore our camping tent categories.
Keep a window cracked slightly to ensure a constant supply of fresh oxygen. Always pack a battery-operated carbon monoxide detector and place it near your cot at sleeping height.
Common Mistakes to Avoid When Buying and Using a Wall Tent
- Buying Thin, Cheap Frames: Avoid using lightweight, flimsy frame poles. Heavy wet snow and strong winds will buckle weak structures, risking damage to your canvas.
- Neglecting the Seasoning Step: Skipping the seasoning process means your first rainy night in the woods will likely involve annoying leaks along the seams.
- Improper Guyline Tension: Leaving the guylines loose allows winds to whip the canvas against the metal frame, which causes rapid wear, tearing, and structural damage.
- Packing the Tent Wet: Never store your tent in its storage bag if it has even a hint of moisture. Make sure it has dried completely in a well-ventilated area. Guide for you: What is an Air Tent?
Final Decision Guide: How to Choose Your Setup
To choose the perfect wall tent for your needs, start by evaluating how you plan to transport it. If you have a truck or a trailer, a traditional cotton duck canvas tent with a galvanized steel frame will provide the ultimate heavy-duty experience.
Next, consider your typical group size. A $12 \times 14$ foot model is highly versatile, providing plenty of room for two or three adults, their gear, and a warm camp stove. For solitariness or small groups, the smaller $10 \times 12$ foot layout is much easier to manage and heat.
Lastly, make sure you have a designated, dry space at home to hang and air out the canvas after every single trip. Taking care of your canvas shell is the key to ensuring your portable cabin stands strong for decades of outdoor adventure. If you are just starting out, learning how to make tent camping more comfortable for beginners will help you transition into this incredible style of wilderness living.
Frequently Asked Questions
How long does setup take?
Setting up a wall tent typically takes 30 to 60 minutes for two people. Your first setup will take longer as you organize the frame poles and learn the tensioning system.
Can you use a wall tent in the summer?
Yes, you can use a wall tent in the summer because breathable cotton canvas allows hot air and moisture to escape. Rolling up the side walls or opening the mesh windows helps maintain a cool cross-breeze.
Do I need a permit to set up a wall tent?
You rarely need a permit for short-term recreational camping on public land, though dispersed camping limits usually cap stays at 14 days. For semi-permanent residential setups on private land, check your local zoning laws regarding fabric structures.
How do I prevent mold on canvas?
To prevent mold, you must dry your tent completely before folding and storing it. If you pack up in the rain, set the tent up at home within 24 hours to let the canvas air out.
What is the best way to heat a wall tent?
The best way to heat a wall tent is with a wood-burning camp stove vented through a designated stove jack. This setup provides dry, radiant heat that dries out wet gear and eliminates interior humidity.